Tag Archive: children


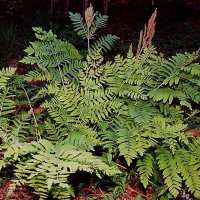
Red Cabbage seedlings on one of my ‘seedy cills’
Old School Garden
11th March 2013
To Walter Degrasse
Dear Walter,
As it’s a few weeks since I last wrote, and more importantly the weather today has put the block on any practical gardening outside, I thought I’d drop you a line and update you with what’s been happening in Old School Garden and further afield.
First, I was pleased to hear that your operation was successful and that you can now get back to lifting things – but make sure you do it safely next time!
Well, it’s been rather mixed few weeks, reflecting the March weather! today, just for the record we have the return of ‘The Beast from the East’ – average 30 mph winds and occasional snow showers whcuin seem to have plunged us right back into winter. Quite a contrast to the weather last week when it reached 14 degrees C! (today there’s a wind chill which will make it feel like -4 degrees!- not that I plan to be out in it). The sort of day that reminds me of the comment one of the vergers at Winchester Cathedral made when he heard Deborah and I live in Norfolk:
‘So, there are about three strands of barbed wire between you and Siberia!’

Winter returns to the Old School Garden
We met him when we paid a visit to this great building at the end of February (you may have seen some of the photos of our trip south on this blog). One of the highlights of that trip was to Mottisfont Abbey where we had a lovely day in bright sunshine. This was perfect for exploring the gardens of this wonderful old estate, especially the relatively new Winter Garden (there is a gallery of pictures of this visit on the blog). The bright sunshine really set off the colours in the winter stems of Dogwoods, Snake Bark maples and Cyclamen flowers (and there were many drifts of snowdrops too).

Magnolia flower buds -frosted once more
Closer to home, I’ve managed to make some progress in digging over one of the main mixed borders here, one that didn’t benefit from an autumn clear up. I guess I must be about two-thirds through this and have taken the opportunity to divide and move some perennials (including grasses), so hopefully we’ll have rather more balanced planting as a result. I hope – when weather permits – to get out and finish this, then I’ll feed the main shrubs (with Fish, Blood and Bone) and use my compost to mulch around them.
Talking of mulch, my friend Robert let me have another load of his excellent horse manure so I’ve spread about a tonne of that over most of the Kitchen Garden beds, fruit trees and bushes and roses (having first given them a little rose fertiliser). It really is lovely stuff, friable, and once raked over incorporates into the soil really well.
Apart from this it’s been a few weeks of getting seeds underway. You may recall that I’d started off a few things back in February, but I now think that may been a tad too early, as some of them are struggling to put on enough growth for me to pot them up. Still there’s time yet for having another go. I’ve now got two windowsills and the greenhouse going with seed trays (including a couple of heated propagators), so soon the house will be full of plants at various stages of development as I move them into progressively cooler conditions and larger pots prior to planting out once warmer times have arrived.
One of my ‘seedy’ window cills – veg and flowers underway
One indoor plant that is doing well is the Clivia I bought at the School Fair a few years ago. I must admit that I probably should have potted this on a few months ago, but this doesn’t seem to have held it back, as it’s just about to burst into flower (and we have last years stalk with a seed fruit on it for added colour!).


Clivia flower head ready to burst

Clivia fruit – from last year’s flower on the same plant
I’ve returned to the gardens at Gressenhall Farm and Workhouse Museum (you remember I’ve been volunteering here for a couple of years?). The gardens overall seem to be in pretty good shape, but with Steve, a friend who also volunteers here, I’ve begun to clear, dig over and mulch borders in the areas we’re responsible for. I’m also pondering how to make some features of the ‘Curiosity Corner’ for young children a little more robust and secure. Perhaps not surprisingly small feet have wandered off the paths and into the beds so trampling down some plants). Steve has some spare trellis so I might try to put up a low screen of this to deter the kids and at the same time grow some dwarf Sweet Peas up it for fragrance and colour.

Youngsters at Cawston Primary School have been enjoying seed sowing
I’ve also begun my regular Thursday ssessions at the local Primary school. The School Garden there is now really taking off, with much more structured use to which I’m contributing. So far this has focused on what we do in the garden in spring, digging over the raised beds and talking about tools and tool safety etc. We’ve got some onion sets in as well as some Broad Beans, and potatoes are ‘chitting’ ready for planting straight after Easter. I also got hold of some more manure for these beds, which have rather poor soil, so our efforts at breaking this up and digging in the manure will hopefully be repaid later in the year. The children – rotating groups from four of the six classes – have responded well and seem to be enjoying the sessions, though they are only about 30 minutes each. I’ll do a final introductory session on Thursday before we turn our attention to renovating the ‘Nectar Bar’ of insect – friendly plans I installed a few years ago, but which has suffered from lack of maintenance. Then, after the Easter break, I think we’ll be into planting potatoes and some of the seedlings the children have been sowing into paper pots (Broad Beans so far but Turnips and other crops to come, some directly into the ground).

Children have been learning how to prepare soil for seed sowing
Well, looks like coffee time, so I’ll put the kettle on, look out at the snow and try to make the best of the day ahead inside!
I’m currently researching climate change and gardening as this is a topic I expect to be writing a post about shortly. I have a few ideas about what we gardeners might do to cope with not only steadily increasing temperatures (and advancing seasons), but the increased unpredictability of the weather – flood to drought to snow blizzards in as many days! Or as one fellow blogger put it recently ‘Four seasons in a week’ !(we’re not quite up to 4 in a day as per the song).
I’ll be in touch again in a few weeks. In the meantime I hope that your recovery progresses well and that you’ll soon be out and about in your wonderful garden!
Very best wishes,
Old School Gardener
If you’ve enjoyed reading this post and others on this blog, why not comment and join others by signing up for automatic updates via email (see side bar, above right ) or through an RSS feed (see top of page)?

Nature Study helps to extend the use of your garden and encourages children to explore habitats beyond the School
Previous posts on school gardening have looked at laying the foundations of a School Garden project, designing your garden and getting the project off the ground. This post looks at how to develop your garden so that it becomes a key resource for the School and wider community.
1. Get into the curriculum
Don’t relegate your garden to just an ‘extra curricular’ activity or club – though these are useful as ways of enhancing the core purpose of your garden: to support children’s learning as part of the school’s curriculum (see 3 below). It might be wise to focus initial garden activity on one or two year groups/classes, so you get the most interested teachers involved (and maybe on your steering group). You can experiment and understand what is working and what isn’t. Once they’ve seen the garden in operation others, including less enthusiastic teachers, will want to get in on the action! Some countries (especially the USA, where School Gardening seems to be well established) have comprehensive curriculum guides for school gardening which link into the wider curriculum of the School.
The recently released draft National Curriculum for UK Schools features children growing plants in the primary years, so this may well give a boost to school gardening and curriculum plans and ideas may follow.There are also some useful guides which enable some basic skills and knowledge to be covered in your gardening activities from some of the national campaigns, especially the Royal Horticultural Society’s ‘Campaign for School Gardening’ and Garden Organic’s work for the ‘Food for Life’ Partnership.
The school could focus on a theme or topic for a number of weeks (say a half term) and weave the School Garden into this work, which could build on work started off in the classroom. As an example my own local school is focusing on ‘Fairy tales’ this half term and so children are getting involved in sowing turnips and beans with links to specific stories. This approach can also work well for specific science topics like ‘insects and animals’, ‘seeds and germination’ or ‘planting and the seasons’.
Don’t forget the importance of basic gardening skills too – I ‘ve been delivering some sessions on tool safety, use and cleanliness linked into preparing the soil and sowing etc.
It’s also a good idea to keep a lesson plan book to record what has been taught and the results in terms of what did and didn’t work, to aid future planning – it’s important to keep making adjustments and small changes to sessions to keep them interesting, new and relevant.

Basic gardening skills, like how to carry tools safely, are an essential part of the curriculum
2. Leadership
As the use of the Garden grows, so will the need for a dedicated person to coordinate and manage it – the ‘Garden Coordinator’ or equivalent. This role is a bit like the School Librarian in that they link with all classes as they come into and out of the garden, helping them to make the most of this important resource (and also making some tasty withdrawals at harvest time!). The role is also important in contributing to discussions about the curriculum and ways in which the garden can be used as a key resource for the school’s programme of learning. The Garden Coordinator may well start off as a volunteer, but in due course it may be necessary to make this a paid position. As suggested in a previous post, the ongoing funding required to support this could come from the School Budget, but more likely it will be found (at least in part) from the Parents’/Friends’ Association and possibly supplemented through regular fundraising activities. Another important job for the Garden Coordinator is to facilitate annual evaluations of the garden. Devise a simple but systematic evaluation questionnaire for staff,volunteers and others to complete so that you can reflect and use the information to plan ahead.
3. Go beyond the formal curriculum
The garden should first and foremost be used as part of the school curriculum, but don’t ignore opportunities to deepen its contribution to learning. For example it can be a great place to begin to understand about the local ecosystem and specific habitats – ‘Nature Study’. It’s important to use unexpected opportunities to deepen and enrich the learning going on – e.g. the arrival of a particular insect or animal in the garden or children pulling flowers apart looking for developing seeds. A good way of getting children to strengthen their writing and observational skills is for them to fill out a ‘Garden Diary’ after each visit ro record what they’ve done and seen and any wider lessons learned. These records (probably best to invest in some robust folders that can withstand outside use) can provide a wonderful presentation of achievement over the year and serve to underline the important role the garden plays in school life.
4. Manage your Garden
The Garden Coordinator is the focus for how the garden functions, guiding the different classes in the tasks needed at different times of the year to keep the garden looking good and working well. With their Steering Group/ Committee, they can also organise a few days when more intensive effort is needed and the wider community (especially parents and staff) can get involved. These ‘Garden Gang’ days or their equivalent are the opportunity to get big jobs done – e.g laying paths, constructing glasshouses and sheds, digging over beds, clearing ponds and so on. The Garden Coordinator will also need to produce a weekly schedule of which classes are using the garden and what they will be doing, plus the staff and other support that will be available. Initially children’s excitement at being in the garden will make for a bit of a roller coaster as they are easily distracted by any novel or unusual thing they see, or touch, or smell (I recently had some ‘interesting’ if not unexpected reactions to handling manure for example!). Whilst it is important to try and use these opportunities creatively, the Garden Coordinator and supporting staff should strive towards getting classes into a quiet, focused way of working so that they eventually arrive in the garden, prepare and get on with what they need to do in increasingly ‘self-directed’ mode (especially older children). Some ideas for helping to bring this about include:
-
Dividing the class into manageable groups (say of 6 or 7 for primary years) – this will enable two or more different activities to be rotated around the groups either within a session or from week to week.
-
‘Digging pit’ – it might be an idea to have a separate space/bed where nothing is grown but where ‘idle hands’ can be directed to dig over the ground – good for digging practice if nothing else!
-
Recruit parent volunteers – as well as teachers and learning support assistants it could be useful to get some additional help from willing parents. Make the most of their skills and expertise (as they will probably be interested and knowledgeable gardeners) and if warranted organise a rota so that they come in and work regularly with particular classes or groups. The Garden Coordinator can reach out to parents of reception class children who may be new to the school and are keen to make a positive contribution to their child’s learning. This additional help will make it easier to conduct garden sessions and make for a richer experience for the children (and adults too!).

Children love to dig- set aside an area for digging, to use those idle moments and hone skills!
5. Promote your Garden
So you’ve got the garden underway and you might be feeling pleased with what you’ve achieved. But don’t ‘rest on your laurels’ as the garden will need continuous promotion if you are to retain and increase interest and involvement by the school and wider community. The children are your best advocates – if they’ve enjoyed a session in the garden they’ll mention it at home and so inform and possibly engage parents. Other ideas to try:
-
write a monthly newsletter/ blog or/and contribute to regular School newsletters
-
publish recipes using garden vegetables growing in the garden
-
send home notes abotu what’s been happening in the School Garden and possibly advice for home gardening in a weekly folder
-
arrange an interview with a local newspaper, radio or TV station
-
take over (after asking of course!) a centrally located notice board and pin up student work and photos
-
have a garden party!
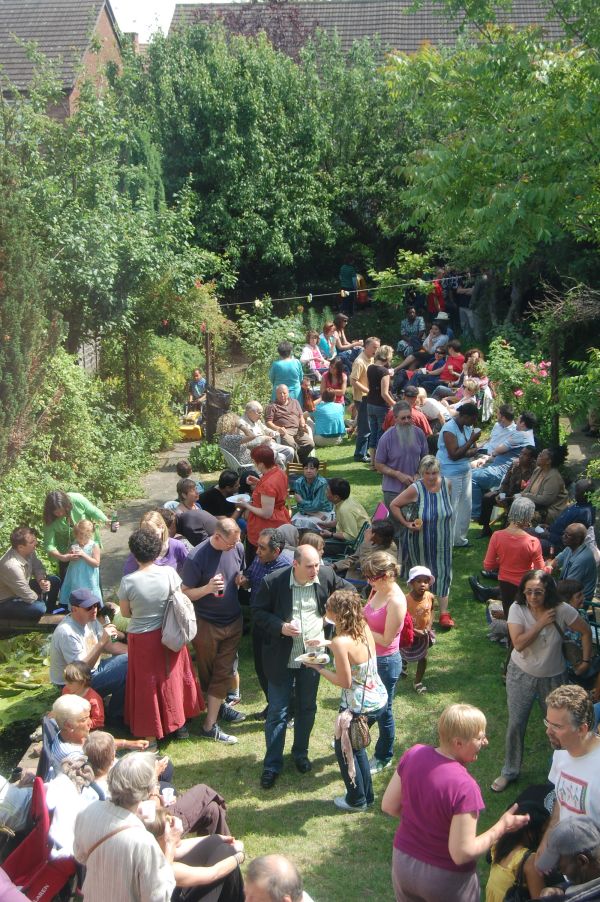
Hold a Garden Party to celebrate and promote your plot
6. Broaden the base
Once the basic programmes are in place you can think about how the garden can contribute to the school more generally and also the wider community:
-
A School Gardening Club in which parents are encouraged to join in?
-
Linking with other schools and having visits to/from your garden with activities to encourage students getting to know each other?
-
Several schools sharing an allotment so helping to spread out the workload and resulting in a wider range of food being grown?
-
Use the garden to inspire and present art projects?
-
Poetry competitions based on the garden?
-
A garden reading session where children take out library books and read these in the garden?
-
A science fair focused on the garden?
And think about ways to get students and teachers to broaden their horizons – perhaps explore the ecosystem in the wider area and different types of habitat like riverside, woodland, coastal marshes etc. Teachers can also be encouraged to take part in environmental education training programmes and so on, including those provided by Garden Organic.

Get your own composting project going
7. Healthy practices
Finally it’s important to develop a set of healthy practices in the garden which will not only benefit it but also lead to important lessons that students and others can take into the future. For example:
Wildlife – welcome insects and other ‘critters’ into the garden and use organic or physical means to control them if they get out hand. Good methods include home-made anti-fungal sprays (using garlic and mineral oil), insecticidal soap made from liquid soap (not detergent) and water in a spray bottle, ‘beer traps’ and ‘wildlife friendly’ pellets or other controls to reduce slugs and snails. And be prepared to tolerate some untidiness and ‘less than perfect’ veg!
Soil – use organic principles to develop a healthy soil; never dig it if it’s wet or frosted; find a good source of organic matter to add to the soil a couple of times a year (make your own compost, get donations of horse or farmyard manure); nurture the organisms in the soil by ensuring that it is never too dry – a mulch will help; once a good soil has been built up try not to dig it or turn it over (unless it’s very heavy of course)- just layering compost/manure and adding mulch (‘no till’ or ‘lasagna gardening’) is less work and is kinder to the insects and other animals working your soil; use cover crops to keep the soil protected over winter and possibly add fertiliser (‘green manure’); set up and actively manage a compost project in the garden ( in the UK possibly seek help from a ‘Master Composter‘ to get you going) – or alternatively set up a worm (or vermi) composting project which is less intensive than traditional compost – making.
Plants – use organic plant foods such as ‘Fish, blood and bone’ or make your own ‘compost tea’ in bag of used compost mixed with water or using plants such as Comfrey or nettles steeped in water for a few weeks.

What’s your favourite tipple? Beer traps are effective at controlling slugs and snails
Hopefully, these tips will help to set your School Garden on a fun, effective and healthy course. In my final post I’ll try to point up some good ideas to enrich and expand your School Gardening programme further – a sort of ‘Master Class’ for school gardening.
Other posts in the series:
Growing Children 3: Seven tips for creating your dream School Garden
Growing Children 2: Seven Design tips for your School Garden
Growing Children 1: School Garden start up in Seven Steps
School Gardening – reconnecting children and Nature
Source & Further information:
‘How to grow a School Garden’ – Arden Bucklin-Spooner and Rachel Kathleen Pringle, Timber Press Books
Budding Gardeners- lots of advice and info
Food & Agriculture Organisation School Garden Planner
California School Garden Network Guide to School Gardening
Garden Organic support for schools
Old School Gardener
If you’ve enjoyed reading this post and others on this blog, why not comment and join others by signing up for automatic updates via email (see side bar, above right ) or through an RSS feed (see top of page)?

 This is my first post profiling some of the ‘Playful Landscapes’ I’ve created in the last few years.
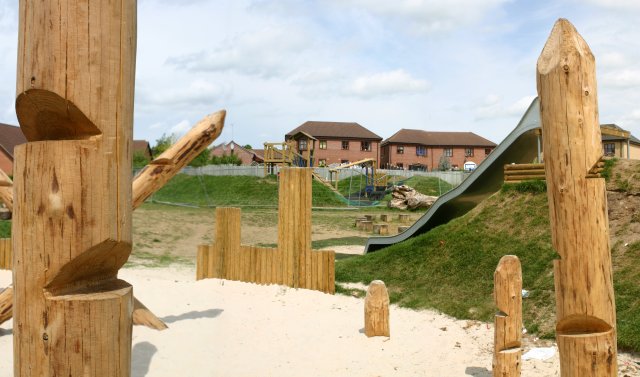
Wensum Way play area, on the southern side of the Norfolk market town of Fakenham, is a sloping site surrounded by housing on three sides and private woodland with public access on the fourth. I was commissioned by North Norfolk District Council to design, produce specifications, assist with procurement and project manage the building of the new play area. The budget was £65,000, funded by a combination of money from the Government Playbuilder programme and local Housing Associations. The brief was to create a challenging play experience for mainly older children, including teenagers.
The Council carried out consultation exercises with local people, including children, and the findings informed the final design. Given the size of the site, budget constraints and proximity of housing (some occupied by elderly residents) this project was a challenge, but a combination of keen pricing by the equipment suppliers and landscapers plus use of ‘custom built’ landscape features, has resulted in a varied popular design. This includes turfed mounds and banks of new planting (both provide screening and play value) and a scooped out ‘bowl’ plus a timber-backed ‘performance area’. There is a mixture of standard play/ sports equipment and wooden posts, cubes, timber log slices and logs are all used to ctreatea range of gathering, imaginative and physical play spaces. The design also features a wild flower meadow, areas of longer grass and picnic tables for families visiting the space. The project was completed in June 2010.


Fakenham


Fakenham

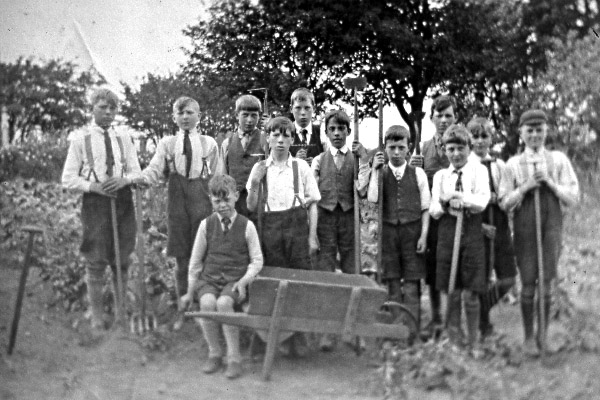
School gardening – old style!
Previous posts in this series about School Gardening have set out some ideas for starting up and designing your school garden project. Having got some foundations in place and a design that’s ready to go, how do you put it into practice? Here are seven tips for creating your dream School Garden.
1. Phasing – so you have ambitious ideas for the design and use of your garden, but perhaps you might be trying to bite off a little too much at once? Think about the levels of volunteer help, promises of materials and cash to hand and tailor your plans accordingly. Sure, strive for your dream, but maybe tackle it in manageable chunks. You can think about parts of the garden that need creating first – say the paths and basic border/bed layout. Add on’s like an orchard or pond could come later? It might be useful to spread these elements over a few years, perhaps identifying a major project for each year which can focus fundraising and community effort and help to keep the energy and momentum up when enthusiasm wanes.

Children digging in
2. Digging in – the first practical day of activity – or ‘groundbreaking’ – is an important event. Make sure it’s both productive and fun. You want to encourage children and the wider community to become committed and involved in the long term. It’s probably best to get any heavy work that involves earth moving or bigger construction done before the official launch day to avoid too many people, machinery and activities on it at once. This will also help to ensure that your main community effort can leave the launch event feeling that they’ve really contributed something worthwhile. Planning for the launch day is important too – think about and order the tools and materials you’ll need and where these should be placed to ensure safe and efficient working.

Local businesses can be involved in creating the garden
3. Community input – communicate your plans, both short and longer term, to the school and wider community so that you get boots on the ground for your ‘Groundbreaking’ event. Plan and organise the various tasks that need doing on the day and have people who can lead groups of volunteers on each activity. Put someone in charge of allocating volunteers to the different tasks as they turn up – a sort of triage. Having a range of tasks available is useful to cope with children and adults with different types and levels of skill (and strength) – tree planting, raised bed construction, soil shifting, path making etc. Maybe you can get extra help from local companies or organisations to add importance as well as ‘muscle’ to the day – how about your local fire station (even better if they can bring along a fire engine) or give a local firm a chance to promote themselves and give something to the community?
For the day itself perhaps have a novel twist that will grab local media interest – could you include a competition for children to see who can create the best signs or pictures of the new garden, and perhaps something fun for adults – the best dressed gardener?! Plan ahead for further workdays or ‘Garden Gang’ events – identify the key tasks that need doing and as with your launch event make sure you organ ise your volunteers effectively on the day, with all the materials and tools needed to hand. Possibly cultivate local business input so that specific skills you need can be brought in – e.g,. a local nursery helping with pruning fruit trees, landscapers/builders willing to help install fencing, etc. In some parts of the UK the ‘Mastergardener’ and ‘Mastercomposter’ programmes are able to offer voluntary support to schools and the community to grow their own food.

Tools will need to be repaired or replaced
4. Money managing – you may have enough cash and other resources for your launch day, but it’s also wise to think longer term and consider the ongoing costs and expenses that will need to be funded once the garden is up and running. A key issue is the ‘Garden Coordinator’ or lead person. Is she/he a willing volunteer or do you need to find some means of payment, either as member of staff or a small ‘honorarium’ to recognise the regular commitment that will be needed? You’ll also need funds to repair and replace tools (some will inevitably get lost). So have a small fund dedicated to this, though it may be in the first year or two this can be quite small.
Odd items of infrastructure will also need to be replaced, repaired or acquired as the use of the garden develops; e.g. shelving for the greenhouse, tables for potting, and the ongoing supply of compost, grit or whatever else your particular garden needs to keep it operating. All of these ongoing costs need to be budgeted for and ideally a source of funding identified so that major fundraising efforts can be focused on more significant projects. The School Budget may be a source of this funding, but it’s likely that you’ll need to call on the Parents’/Friends’ Association, local charities, company sponsorship etc. to meet at least some of the ongoing expenses.
5. Fundraising – if you’ve decided to phase your project then you’ll need to plan ahead for the funding and other ‘in kind’ support you’ll need to achieve the later elements of the garden. So some sort of fundraising effort is likely to be required on an ongoing basis and it might be sensible to put someone in charge of this, ideally someone with the skills to put together applications for funding to public/ charitable sources as well as ongoing campaigns that can focus on raising cash via the school and local community – local lottery games and fundraising events (quizzes, fireworks, cake sales) for example. Could you also ask parents to make an annual donation to the garden?

Steering Group meetings are essential
6. Steering the project – by now the real movers and shakers behind your project should have identified themselves and these people need to be nurtured into your active committee/steering group for the Garden. Regular, focused meetings to discuss progress and plans will be needed, but avoid these becoming too formal and bureaucratic. You need to ensure that those giving their time to the project feel that they are contributing and are valued, so make your meetings pleasant social events as well as efficient at tackling the business – side of things. It’s also important to keep the garden relevant to the curriculum, so regularly review how it’s being or could be used to enhance the learning at the school and possibly encourage teachers and others to develop their skills through training or attending specific workshops on school gardening.

Plant and produce sales can raise cash for the garden and celebrate its achievements
7. Celebrate – not only should your launch or groundbreaking event be a celebration of what’s been achieved and what’s planned, but it’s important to regularly celebrate the garden as key milestones are reached. Providing food and drink on events is one way of oiling the wheels and making events an enjoyable community gathering (especially if parents and the community don’t have many other opportunities to get together locally). Keeping local media interested in your project is also important as reporting in local newspapers, radio, tv and increasingly the internet all affirm the value of the project. As they say ‘nothing succeeds like success’!
The School website or blog could have regular posts about activity in the garden (maybe you’ll need someone to take responsibility for this aspect of things) and regular email updates to publicise events and fundraising are a must. ‘Sending a note home’ with a child is perhaps notoriously unreliable as a way of communicating with parents, so maybe think of more novel ways of getting the message across – a stall to sell plants and produce from the Garden and present infotrmation about it’s achievements at the School summer fair, or displays of children’s work in the School which can be seen at parent’s evenings and other events, for example.
So by now the garden should be well into ‘start up’ mode and will be the talk of the School and local area! In the next post in this series I’ll be offering some advice on good practices for developing your School Garden into an effective learning and community resource.

Let’s get gardening!
Other posts in the series:
Growing Children 2: Seven Design tips for your School Garden
Growing Children 1: School Garden start up in Seven Steps
School Gardening – reconnecting children and Nature
Sources & Further information:
‘How to grow a School Garden’ – Arden Bucklin-Spooner and Rachel Kathleen Pringle, Timber Press Books
Budding Gardeners- lots of advice and info
Food & Agriculture Organisation School Garden Planner
California School Garden Network Guide to School Gardening
Old School Gardener
If you’ve enjoyed reading this post and others on this blog, why not comment and join others by signing up for automatic updates via email (see side bar, above right ) or through an RSS feed (see top of page)?
‘Over the last 3 years we have reached over 2000 young people and families across woodland days, teenage camp, youth training and leadership programmes, forest schools and family days. Our flagship projects, Call of the Wild and Earthwise, were funded under Natural England’s Access to Nature Grant and MIND’s Ecominds Grant and raised over £160,000 towards creating outdoor opportunities for the most disadvantaged groups in our society. The results show that this kind of work leads to better health and wellbeing, more opportunities, a greater sense of community and respect.’
For more information visit http://www.circleofliferediscovery.com
 In part one of this series of posts I outlined a few tips on getting your School Garden project up and running. If you’ve got the key people on board, identified what the overall aims and objectives of the project are and hopefully secured some start-up funding and promises of help, it’s time to get serious about the design of your Garden. Here are seven ideas to help you…
1. Who will be using your space and what are their needs? It’s important to think about the range of users and why they’ll want to use your garden. Yes, children, but what numbers and ages? During the school day or afterwards? Will parents or the wider community want to get involved? And just what sorts of activities will your garden need to support: growing food, outdoor play, studying nature, formal lessons (in some sort of shelter?) etc.? It’s important to list these and start to see what they suggest in terms of the overall layout of different areas, spaces, structures etc
2. Survey and appraise your site– you may have your area already defined by walls, fences, hedges etc. or perhaps you’re confined to an area of the playgrround. In any event it’s important to accurately measure out the plot. From these measurements you can create a scale drawing (say 1cm = 1 metre) and any key features that are likely to remain – e.g water taps; significant slopes; trees; hedges; types of soil (you can see if it needs improving and what the pH is by using a simple test kit); the way the site lies (in relation to sun, wind, prevailing rainfall etc.) and how the site is accessed. It’s also worth checking on the current maintenance regime and who’s responsible for this (e.g. if you’re thinking of taking over an area of sports field that is regularly mown).

A gathering place like this shelter is probably important
3. Think about basic needs:
- Sunlight- ideally you’ll have a space which is open to sun at most times of the day, but use your survey information to identify the sunniest and shadiest spots and start to think about what to place in these
- Shelter – from strong, cold winds and midday sun – look at boundaries and think about growing hedges , using fences (ideally with gaps to allow slowed wind to pass through) or putting in wind breaks of mesh material. Do you need some trees or an awning to provide a sun shade?
- Water – either from a tap or through adequate outdoor harvesting of rainwater from sheds, glasshouses, or possibly school buildings
- Pathways – to get around the various areas. These need to be wide enough and of a surface and gradient that a wheelchair – user can negotiate without too much effort
- Good soil – if you’re removing asphalt, the soil underneath is likely to need radical improvement or possibly overlain with imported topsoil. In most situations you’ll need to get organic matter – compost, manure, leafmould– to improve it over time
- Fencing or another suitable boundary – to keep younger children in and intruders out . You could grow a hedge and whilst this gets established, on one side try a chain link or similar fence which in due course can be removed leaving you the wonderful sight and wildlife value of the hedge
- Plants– what are you intending to grow? Each type will have different needs – are you envisaging growing under glass/polythene, if so space for a glasshouse/polytunnel will be needed. Do you envisage some sort of wildlife pond, if so this will need a suitable range of plants and may need a secure boundary
- A gathering area – where groups/classes can be instructed or shown a task. This can be outside and informal (e.g. getting an annual supply of straw bales is a good cheap way of providing seating) or enclosed within a shelter
- Storage– a good tool shed, which if large enough can possibly double up for seed sowing/potting up, or alternatively a separate shelter/structure for this if that’s something you envisage doing in your garden
- Tools and equipment – these will vary according to what you are growing and the size of your plot (and your children), but here’s a guide. Tools: gloves– enough for everyone who’s gardening at any one time; trowels and hand forks or hand cultivators (enough for half a full class – say 15) ; a mix of adult and child – sized spades, digging/border forks, rakes, hoes (3 or 4 of each); wheelbarrows (probably at least 3); Secateurs, loppers, pruning saws, brooms (1 or 2 of each); watering cans – a couple should do, you can make home made ‘plant showers’ out of plastic tubs with holes in the bottom. Equipment: clipboards (one each for a full class); stationery supplies – paper, pencils, crayons, markers, glue, string, tape, scissors and a First Aid Kit! Also, if you plan to sow and grow your own plants you’ll need a range of other equipment like seed trays etc.

Get some child -sized tools
4. Get the children involved (and your wider support group) – you will by now have a good idea about what could be in the garden and you need to share these ideas and discuss others with the children who’ll be using the space and those key adults (teachers, parents etc.) who will also want to feel the project is theirs. You can devise some fun ways of engaging these people, perhaps involving n a loose outline drawing of the plot and your first ideas in pictorial form (e.g photos cut out from magazines), from where children can be asked to draw/write/otherwise think about and convey their ideas and wants for their garden (I can guarantee someone will want a swimming pool!). This will generate interest and ownership of the project.

Raised beds, narrow enough to allow access to the centre without walking on the soil
5. Options for planting – depending on what you want to grow and the space you have available I guess you’ll either be planting in containers (pots, planters and all sorts of quirky planters too), open beds (which have their edges cut into the surrounding ground, often grass) or raised beds– these are edged with boards or other timber and so help to define the growing areas (especially for food crops). If the sides are about 20cms high they can be used to contain additions of manure/compost from year to year as you build up the soil’s goodness and structure. Raised beds can be to varying heights to cater for different ages of children, but ideally they need to be narrow enough to be tilled from the surrounding pathways so that feet don’t trample and compress the growing areas. Rectangular beds are probably the most efficient shape. These beds can be constructed using pressure – treated timber or alternatively there are several places where ‘ready to assemble’ kits can be purchased. If you want to avoid too much digging of the soil (this can be detrimental to its structure) you can just lay a covering of organic material over the beds each year (taking note of the requirements of different groups of plant if growing food) and lightly fork this top-dressing in as you begin the growing season.

How about a plastic bottle greenhouse?
6. Go beyond basic needs– it’s important to focus on basic needs in developing your designs, but if we just stick to the functional requirements, we will miss an important opportunity to make the School Garden exciting, fun and an experience for all the senses! So, think about growing herbs and other plants which have differing fragrances, leaf textures, colours and are in other ways interesting – tall grasses that catch the sunlight and bend in the wind for example, or Stachys (‘Lambs’ Ears’), which has wonderful velvety leaves, Lavender for that midsummer heady smell! Likewise Sunflowers are a wonderful example of the power of nature as they shoot up to enormous heights and beauty starting from little seeds that the children can sow themselves. Similarly, children can get involved in producing signs for different parts of the garden, another way to make them feel that this is their garden and make it look funky too!

A simple scale model helps to convey your design
7. Consult on an outline plan – once you’ve taken all of the above into account you can firm up your plans on paper and maybe even produce a simple 3D cardboard/ scrap model of how your garden could look! Models are especially useful for getting children (and adults) to imagine just what features there are and what the layout will look like. This could go on display at the School for a week or two and you can invite people to put their views on sticky notes nearby so that everyone can see who’s saying what. Gather these up and then with your committee/support team work out those which should be incorporated into the scheme.
By the end of this process you should have a clear, accurate design plan on paper that everyone is signed up to and which is ready to rock!
In Part 3 of this series I’ll share some thoughts on constructing your School Garden and especially the day you ‘ground break’.
Sources & Further information:
‘How to grow a School Garden’ – Arden Bucklin-Spooner and Rachel Kathleen Pringle, Timber Press Books
Budding Gardeners- lots of advice and info
Food & Agriculture Organisation School Garden Planner
California School Garden Network Guide to School Gardening
Old School Gardener
If you’ve enjoyed reading this post and others on this blog, why not comment and join others by signing up for automatic updates via email (see side bar, above right ) or through an RSS feed (see top of page)?
Where trees for climbing aren’t readily available these wooden climbing structures provide a great alternative
“I prefer climbing trees than climbing frames because they are quite different and there are many ways to climb. I can climb up quite high. My mum is worried but I’m not. I’m quite good at it. I’ve never fallen off a tree because I climb in the quite safe places of trees. It’s quite thrilling being up there. My clothes get messy though.” Christina (aged 11)

So, where did you play and what were your favourite sorts of play places? I bet that some of you (most perhaps) will mention bits of wasteland, parks, on riverbanks, in other people’s derelict gardens and up trees…
It’s likely that most outdoor play happens in ‘natural’ places, but that’s not to say that this is any better than playing on play equipment or in conventional, designed playgrounds. These defined ‘children’s spaces’ make children feel they have permission to be themselves, have fun and are valued – however, they are usually adult- created places. Equally we don’t need to think that every aspect of the playground needs to be ‘manufactured’ or protected; sand or bark are as effective as rubber safety surfacing. And perhaps we don’t need to fence everything in – though this probably gives a sense of security to parents of the youngest children.

A ‘Nectar bar’ of insect- attracting plants
There is now a wealth of evidence to suggest that children benefit from being outdoors and in ‘natural’ places – especially if we want them to grow up with an understanding of the natural environment and take a responsible attitude towards it. In 2006, Playday focused on Play in the Natural Environment. Key findings were:
- Children will naturally gravitate to natural places to play; they are seen as more likely to be free from an adult agenda, free – creative – self-directed.
- Natural places create a sense of wonder and awe
- These places link to an appreciation of the natural world as adults
- Barriers to play in the natural environment include adult worry of danger – fear of strangers – bullies – quality – and the sheer lack of them in towns and cities
- ‘Nature deficit disorder’ = a disconnection or aversion to nature
- We need to understand the importance of the natural environment and be prepared to protect, expand, leave it alone and ensure variety. There is a need for specialised/dedicated training.
A ‘Giant’s Causeway’ provides a challenging ascent
So, can designed play spaces be in any way ‘natural’? There is scope for bringing together the best of ‘off the shelf’ play equipment and those which use natural materials, objects and environments – or perhaps are an artful interpretation of these.

The best play spaces are unique and valued by their community. A design -led approach which combines play features custom-built for their location, with ‘off the shelf’ play items like slides, climbing frames, swings and zip wires is a key interest of mine. I’ve included a few pictures of some of my own work in creating these ‘play landscapes’.
Some of the ‘natural’ ingredients which can feature in designed ‘play landscapes’ are:
1. Making the most of natural features– fallen trees to climb, clumps of tough plants for building dens, slopes to roll down, small things like piles of grass clippings and places that encourage insects and other critters (e.g. the ‘nectar bar’ shown in one of the photos).

Earth sculpting
2. Land sculpting – do you live in a pretty flat landscape? Introducing some variation in the play area by sculpting the land into ditches and hills provides endless fun for children of all ages.
3. Boulders – these are becoming a feature of many play areas, but often lack the size and careful placing to make them a good play feature (as stepping-stones, or for clambering up for example). Ideally they need to be of a smooth granite for ease of climbing and to avoid dangerous sharp edges.
4. Sand – there is an ‘urban myth’ that sand pits attract cats and other animals who use it as a toilet. Though there are examples of this as an issue (and possibly also from vandals leaving cans, bottles and other rubbish in them)- the benefits of sand as a play medium usually far outweigh the possible risks, especially if they are inspected daily to remove any offending items. Sand can be used as a safety surface also though not where rubber or other matting is more practical or where children playing in the sand risk being knocked over by those using some equipment (e.g in the area at the end of a slide). And why not go one stage further and create/designate a muddy/digging area?

A notched pole climber with sand under
5. Trees– either naturally fallen or imported, dead trunks provide great climbing, sitting and ‘hang out’ areas. Some larger living trees are suitable for climbing or having rope swings attached.Planting groups of new trees is also a good idea, but these should be out-of-the-way of key play features, in areas where the temptation to uproot them is minimised! Where you can’t have natural trees, it’s possible to create tree-like structures to climb (see pics).

Long grass and hedges create places to hide
6. Hedges– mixed native species hedges are, once established, a wonderful habitat for many different insects, birds etc. and can include blackberries etc. as a fun source of food in the autumn! Don’t worry about thorns and prickles – once ‘bitten’ children, like adults, will be careful what they touch…

A woodland pond and climbing tower
7. Water– surely a no go for children’s play? Well, once more it’s easy to over react and miss what can be a wonderful play opportunity. Rather than ban any water we should think about how it can be safely included in a play landscape – from a hand pump combined with sand play/mud perhaps (see pic), or in a shallow canal or stream….
8. Grass– introduce areas where the grass is not cut as frequently so as to vary the play landscape. Children love long grass – it seems more ‘jungly’ as one youngster commented to me!

A sand and water play feature aimed at younger children
So there are practical ways of creating interesting, naturalistic ‘play landscapes’ which avoid the one size fits all mentality so often applied to play areas (or ‘KFC’ = Kit – Fencing – Carpet).
In tomorrow’s post – how to secure more natural play for your children- ten tips for parents.
Further information: Play again film
Old School Gardener
If you’ve enjoyed reading this post and others on this blog, why not comment and also join some other people and sign up for automatic updates via email (see side bar, above right ) or through an RSS feed (see top of page)?

Sunflowers were planted by a local playgroup at the May opening of the garden – with the wet summer they grew to over 2.5 metres tall!
A renovated garden is moving towards maturity in what were once exercise yards for tramps and unmarried mothers at Gressenhall Farm and Workhouse Museum, Norfolk.
The garden occupies what were once two exercise/work yards for inmates of the Victorian Workhouse. The footings of what was once the dividing wall between these two yards can still be seen, emerging as the lawn above is worn away. In Victorian times these yards joined two blocks of accommodation:
- for so-called ‘casuals’ or tramps who used to travel between workhouses earning ‘a night’s board for 2 days hard labour’ – possibly crushing stones for use in road building
- for unmarried mothers nursing their babies – they wore distinctive uniforms to mark them out from the other workhouse inmates.

The refurbished ‘Education Garden’
These buildings today provide the Museum’s Learning Centre and space for occasional groups and events. Until last year the garden area between the two buildings was kept maintained as grass and a range of mixed borders which is an important picnic/ rest spot as well as being used by school and pre school groups for art and learning activities. In 2012 funding from the Friends of the Museum as well as the Museum itself and donations from a range of local businesses were secured to refurbish and redesign it. A number of design issues were tackled, including:
- Providing further paved terrace space with new picnic tables and some renovated paving
- Introducing a number of planting containers to add interest to the paved terraces
- Realigning paths to follow ‘desire lines’ and make access easier
- Deepening borders to provide more visual interest and unified planting
- Creating a new ‘curiosity corner’ to provide a space designed for under 5’s which contains a range of features to encourage children to explore.
Mary and Derek Manning plant a tree to mark the opening of the garden
The newly renovated garden was formally opened on 6th May 2012, and two of the original gardening volunteers, Mary and Derek Manning, planted a ‘Paper Handkerchief Tree‘ to mark the occasion. Local children also played their part and cut ribbons to open ‘Curiosity Corner’.


One of the new residents of the Garden!
The Curiosity Corner proved to be very popular in its first season last year and included some giant sunflowers planted by a local play group as well as a turf seat; a willow tunnel and arches; hazel wigwam; mirror; ‘fossil slab’; various ‘animals’ hidden away in the planting and a range of different path surfaces and planting. There is also a half barrel filled with stones,water and pond plants, so that youngsters can ‘get up close’ to this watery habitat.

‘Curiosity Corner’
The coming year will see the garden mature further and hopefully there will be sunny days so that visitors can really enjoy this lovely picnic area at its best.

New planters with sweet peas on conical obelisks
Quizzicals:
Two more cryptic clues to the names of plants, fruit or veg…
- The scourge of female chickens
- Cheap goods in a pile of dung
Old School Gardener
If you’ve enjoyed reading this post and others on this blog, why not comment and also join some other people and sign up for automatic updates via email (see side bar, above right ) or through an RSS feed (see top of page)?