Category: Gardening techniques


Flooding- How Permacuture Design can help

from-bottom-of-garden.jpg

An interesting article about one person’s experience of ‘extreme weather events’ and how permaculture design helped to redesign a garden and home. Click on the title for the weblink to the article.

You might also be interested in the series of articles I wrote about Gardening and Climate Change last year- have a look in the ‘Four Seasons in One Day’ category of articles in the right hand column.

Old School Gardener

Sophie Hudson's avatarThe Forget-me-Not Cultivation Blog

I know, February – it’s so cold and grey.

There appears to be mud and bare branches every where.  But don’t despair.  Below are 20 plants you can sow from seed in February that will make you feel like Spring is here now.

February is actually a really good month to begin setting your garden, patio, and balcony up ready for the new growing season.  So ignore the wind, the rain and snow (what snow!), and instead gather your tools.

February is a month when all seeds bought/saved need to be sown indoors only.

It’s not warm enough outside to leave the little seeds fighting for warmth when there isn’t a lot going around.  Instead you can start your garden off indoors and once the plants have germinated and grown they can be moved and planted outside.

By sowing a month early (assuming you take March to be the month…

View original post 443 more words

Using pallets and other recycled materials to create useful garden equipment and features seems to have really taken off in the last year- at least the posts I’ve made to Old School Garden during that time are among my most popular.

My own exploits to date have been limited to a set of vertical planters, shortly to be used as mini raised beds for some young children at my local primary school. Following a bit of a reorganisation of outside stores here at the Old School, I have a redundant wooden bicycle rack which looks perfect as the base for a ‘plant theatre’ so I might get round to doing that as the days lengthen and (hopefully) the air warms up. In the meantime here’s the latest batch of ideas I’ve gleaned from Facebook sites like 1001 pallets, urban gardens, container gardening and the like. Enjoy!

First some sheds, shacks and greenhouses….


Next a few planters…..

And now some serious outdoor building work…..

Finally a few odds and ends…..

Old School Gardener

PicPost: Baroque Brassicas

Cabbage beds at Villandry, France

Old School Gardener

PicPost: Mexican Wave

Green wall in Mexico City

How to build a Cold Frame

‘Spring is around the corner and it will soon be time to start sowing seeds.

For those of us who haven’t got a greenhouse, (especially a nice warm one like our editor Maddy’s, who has been using her hot bin composter to keep her greenhouse above freezing all winter), the unpredictable weather can have a huge impact on when we start our seeds. With the possibility of late frosts, seeds can be easily damaged, right through to April and May.

So making a cold frame is a great way to start off your seeds in a warmer and more protected environment, until they are strong enough to be planted out in the unpredictable weather……’

Great idea from Permaculture Magazine – click on the title link for further information and other useful links

Old School Gardener

seedlings
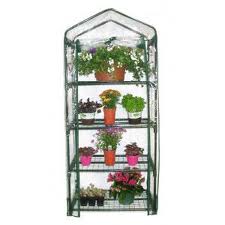
It’s that time of year to get some seeds sown and new growth underway- but how do you ensure your new babies stand the best chance of survival? Here are some ideas for your ‘transfer window’- turning your newly born into successful seedlings…

1. Right pricking out time

For seeds sown in trays or small modules, once the seeds have germinated and you can see growth above the soil, keep a close eye on their leaves. Once the first ‘true’ leaves have formed (these will look more like the final leaf of the plant and follow on from the ‘seed leaves’ that are simpler in shape, like those in the picture above) it’s time to prick out these little seedlings and transplant them, usually into pots or larger modules. If you leave the plants longer they risk becoming spindly and overcrowded as they fight for what little nutrients are left in the seed compost.

2. Right tool

You need some sort of thin implement to tease out the seedlings – I find a chop stick or wooden BBQ skewer is useful. Or use a dibber or pencil – but these might be a bit too thick for some smaller seedlings. Gently prise the individual plants out of the compost so that they bring their roots and possibly a little compost with them.

3. Right handling

Gently take hold of the leaves of the seedling to help it on its way – don’t hold it by the delicate stem as crushing this will deprive the plant of its main channel for water and nutrients. Place your plant into a hole big enough to take the roots comfortably, settle the plant slightly deeper than it was in the original seed tray/module.


watering-vegetable-seedlings
Watering in the transplants

4. Right Pot

Use clean pots and in general a smallish pot (3″ diameter) or modular tray is probably OK for this stage. A guide is that the pot should be about twice as wide as the roots of the plants you’re dealing with. If you want to avoid several potting on stages and you have the room, then go for a bigger size pot/modular tray. Make sure that you clearly label the plants and possibly keep a note of when you transplanted them.

5. Right compost mix

The compost mix you use for potting up needs to have the nutrients the plant is looking for and the right consistency to allow drainage and air around the developing  roots. You can opt for a particular mix for the plants you’re growing but for most I find a general purpose peat free compost (e.g. ‘New Horizon’) is nice and ‘open’. But it can be improved by sieving (to remove bigger bits of organic material), and adding some horticultural grit or ‘perlite’ in the ratio of 1 part grit to 3 parts compost. Or you can make up your own mix.  If you keep your transplants in the same pot for a few weeks you might need to apply some liquid fertiliser to make up for the nutrients that are gradually depleted from the compost.

tall plastic greenhouse
A portable greenhouse like this one can be used to grow on seedlings

6. Right environment

Different plants will have different environmental requirements, but in general they need to be thoroughly watered in to their new pots/modules and moved into a light, cooler place than they were in for germination – but avoiding drafts and direct sunlight. For the first few days, the plants might benefit from covering with plastic to lessen the ‘transplant shock’ they experience. Make sure you keep the plants watered so that the compost is just moist – avoid over watering as this can lead to diseases.  Gently brushing the tops of your transplants with your hand or a wooden stick will help control their height and increase stockiness. Ideal transplants are as wide as they are high. Gradually acclimatise the plants to outside conditions – a cold frame or greenhouse after being in the house, for example. Then give them a couple of hours in the outside each day (as long as it’s not too cold or windy) before they are fully ‘hardened off’.

7. Right potting – on time

Keep an eye on your new fledglings and occasionally look underneath the pots – when you see roots  emerging from the bottom it’s probably time to ‘pot them on’ into larger pots. This is broadly the same procedure as for ‘potting up’ and may mean that some plants are transplanted two or three times before they are finally placed in the garden. ‘Keep them moving’ and don’t allow them to become pot bound.

Further information:

Capel Manor College video on pricking out

Garden of Eaden video etc.

Old School Gardener

If you’ve enjoyed reading this post and others on this blog, why not comment and also join some other people and sign up for automatic updates via email (see side bar, above right ) or through an RSS feed (see top of page)?

Well here it is, my plan for the kitchen garden here at the Old School. I’ve reviewed last year’s results and have tried to rotate crops as well as introducing more variety and greater successional cropping. This approach will, I hope,  help me to avoid gluts, reduce the overall level of food and waste, while at the same time increasing the range and the ornamental value of the area through introducing more perennial and annual flowers.

I’m also going for some ‘heritage’ varieties- squash, cauliflower, leek, pea, runner beans and beetroot.

What do you think?

kitchen gdn layout 2014

Old School Gardener

A 'sub shrub'- Hypericum calycinum

A ‘sub shrub’- Hypericum calycinum

As spring approaches it’s around now that some shrubs should be pruned. This week’s question, from Celia MacKnyff of Cutaway in Yorkshire, asks:

‘What is a sub shrub and should I treat it differently to an ordinary shrub?’

Celia, a sub shrub is a plant that is woody at the base but has annual stems like those of a herbaceous plant. These stems die back most years to the older woody growth. The ‘Rose of Sharon’ (‘Great  St. John’s Wort’ or Hypericum calycinum) is a good example. The stems should be cut back every spring, not to ground level, but to the new shoots on the woodier stems at the bottom. I’ve been out in Old School Garden doing some pruning of these and other shrubs in the last few days and, not surprisingly as we’ve had such a mild winter to date, many of these stems look pretty healthy and are still carrying lots of green leaves. Nevertheless, if you want to benefit from fresh new growth, now’s the time to prune them.

Lavenders are also treated like sub shrubs

Lavenders are also treated like sub shrubs

Small, low shrubs such as Lavender, Periwinkle and Thyme, and many members of the family Ericaceae, such as Cranberries and small species of Erica, are often classed as sub shrubs. As far as pruning Lavender is concerned there are perhaps two schools of thought on this – either prune back the flowered shoots in autumn or spring. Doing this in the autumn is good in that there’s till time for new growth to be put on before winter, which helps maintain a nice compact shape to the plants over the colder months. However, if the weather is really cold you may suffer from some die back, so some people leave pruning until the spring. Nevertheless, small amounts of frosted growth can be tackled by further light pruning in the spring so that new vibrant growth is stimulated. Take your pick! In both cases pruning should be limited to the sappy top growth and should avoid cutting into the older woody stems.

It's important to get the right pruning cut to avoid damaging shrubs and/or letting in disiease

It’s important to get the right pruning cut to avoid damaging shrubs and/or letting in disease

Whilst we’re talking about pruning sub shrubs it’s also worth remembering when to prune different flowering shrubs. There are two basic groups, one which flowers in summer and autumn (‘late flowerers’) on the tips of shoots that grew earlier the same season. This group includes Buddlejas, large flowered and cluster flowered Roses, Caryopteris and some later flowering Clematis hybrids (as well as sub shrubs like Hypericum). These should be pruned back hard to new buds in spring as they appear, so as to encourage development of these into strong new flowering shoots. I’ve tended to prune my Buddlejas a little later than the Hypericum, as late frosts may do damage to the new buds and therefore it’s a good insurance policy to wait until you can see healthy, strong buds to cut back to and the risk of really cold weather has passed. I’ll probaly prune mine later this month or in early March at the same time as I prune back my Dogwoods to encourage new stems that create great winter colour.

Buddlejas are 'Late flowerers' and need hard pruning in the spring

Buddlejas are ‘Late flowerers’ and need hard pruning in the spring

The second group (‘Early flowerers’), includes plants that flower in spring on shoots which grew the previous season and includes Philadelphus (‘Mock Orange’), Forsythias, flowering Currants (Ribes), Weigelas and the ‘Beauty Bush’ (Kolkwitzia). Though its is perhaps less important to prune these, it can be done to tidy up the shrub  immediately after flowering, by removing the branches that carried the flowers. This also encourages new growth to be put on alongside other shoots that have already grown but not flowered – these shoots must be left unpruned and will carry the flowers next season.

'Early flowerers' like Weigela, should be pruned after flowering

‘Early flowerers’ like Weigela, should be pruned after flowering

Old School Gardener

An unusual ‘themed threesome’ of garden/outdoor projects – fancy a cuppa something?

Old School Gardener

Finding Nature

Nature Connectedness Research Blog by Prof. Miles Richardson

Norfolk Green Care Network

Connecting People with Nature

Discover WordPress

A daily selection of the best content published on WordPress, collected for you by humans who love to read.

Susan Rushton

Celebrating gardens, photography and a creative life

Unlocking Landscapes

Writing, photography and more by Daniel Greenwood

Alphabet Ravine

Lydia Rae Bush Poetry

TIME GENTS

Australian Pub Project, Established 2013

Vanha Talo Suomi

The Journey from Finnish Rintamamiestalo to Arboretum & Gardens

Marigolds and Gin

Because even in chaos, there’s always gin and a good story …

Bits & Tidbits

RANDOM BITS & MORE TIDBITS

Rambling in the Garden

.....and nurturing my soul

The Interpretation Game

Cultural Heritage and the Digital Economy

pbmGarden

Sense of place, purpose, rejuvenation and joy

SISSINGHURST GARDEN

Notes from the Gardeners...

Deep Green Permaculture

Connecting People to Nature, Empowering People to Live Sustainably

BloominBootiful

A girl and her garden :)