A metal arbour with a rambling rose
Arbours and pergolas can be important elements in a garden, adding visual interest, especially height, and functional value as shading or seating.
Arbour used to refer to an orchard, garden or lawn, but today its use tends to be limited to a leafy glade or bower shaded by trees, vines, shrubs, etc. – especially when trained about a trellis. More precisely ‘a shady garden alcove with the sides and roof formed by trees or climbing plants trained over a framework’ (Oxford English Dictionary).This alcove may often contain a seat.
Pergola is the term given to a horizontal trellis or framework, supported on posts, that carries climbing plants and may form a covered walk, though sometimes it is also used to describe the same sort of structure as an arbour. Today pergolas are also used to provide an overhanging structure for an entertaining/ dining area such as a patio or terrace.
So why have these structures?
-
Provide privacy and shade
-
Divide up areas of the garden or/and provide an interesting route along a pathway or focal point
-
Provide support for plants
-
Provide a decorative structure

A flower-covered pergola in the Canary Islands

A painted wooden arbour
Here are seven tips to make the best use of these structures in your garden:
1. Right design – the design of the structure needs to complement the overall style of the garden, whether ‘cottage’, contemporary or classical etc. The use of curves or straight lines in the design can be especially important here, with curves flowing more easily in a romantic, informal style and straight lines often better in more formal settings.
2. Right materials – whether wood, metal, brick or stone or a combination of these, it is again important to complement other materials in the garden/house and reinforce and harmonise with the overall style.
3. Right construction – a solid installation as well as overall design is important to ensure the structure is stable in winds etc. Once the structure becomes laden with foliage it can act as a significant wind barrier so needs to withstand the forces this will bring.
4. Right plants – again the choice of plants to climb over your arbour or pergola is important both as a way of reinforcing the garden’s style and because of the implications for ongoing maintenance – a vigorous rambling rose like ‘Kiftsgate’ could become a night mare unless you are prepared to prune and tie it in at the right time of the year. Choose plants with the ultimate height/length that is suitable for the structure or you could find that the structure looks under planted or alternatively is overwhelmed with foliage.

A modern metal pergola
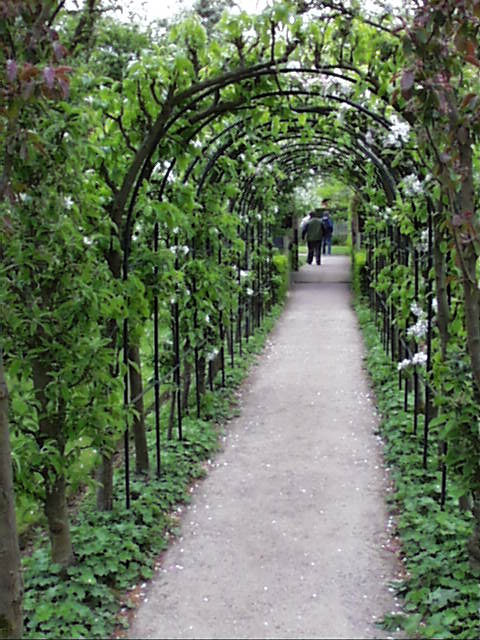
5. Right position – these structures need to be placed within the garden – possibly to provide a focal point and informal seating area away from the house (arbour), an interesting tunnel through which to walk within the garden, so ‘framing the journey’ or alternatively close to the house over a patio (pergola). They also need to be positioned to gain the right level of light and shelter for the plants you envisage growing up them. And if you have an arbour with a seat think about what view you want to be looking at from it.

Pergola- the Old Vicarage, East Ruston
6. Right flooring– again think about the material you use underneath the structure. It should be durable and harmonise with the path/terrace/patio materials in the wider garden, though it can contrast with these to help define the space covered by the arbour or pergola.
7. Right maintenance – keep an eye on your garden structures and look after them – re-coat painted wood regularly, check screws,nuts and bolts for rust, loosening or weakening joints.
Further information:
Great Designs for a garden party
Better Homes & Gardens examples of pergolas
58,779 garden pergola Home Design Photos
Old School Gardener
If you’ve enjoyed reading this post and others on this blog, why not comment and join others by signing up for automatic updates via email (see side bar, above right ) or through an RSS feed (see top of page)?