Tag Archive: planting


IMG_8801You may have read previously that one of my latest projects involves designing, and then helping to install a new border alongside a 200-year-old ‘Crinkle Crankle’ Wall, near Fakenham town centre, Norfolk. I’m not sure about the history of the wall, but it seems to have enclosed a substantial garden for an important house next to the Church (possibly the old Vicarage or Rectory?). There’s certainly evidence of lean-to glasshouses on some (straight) parts of the wall, which are all ‘listed’ as being of historic or architectural interest.

Crinkle Crankle walls have an interesting history, as Wikipedia says:

‘A crinkle crankle wall, also known as a crinkum crankum, serpentine, ribbon or wavy wall, is an unusual type of garden wall.

The crinkle crankle wall economizes on bricks, despite its sinuous configuration, because it can be made just one brick thin. If a wall this thin were to be made in a straight line, without buttresses, it would easily topple over. The alternate convex and concave curves in the wall provide stability and help it to resist lateral forces.

Both crinkle and crankle are defined as something with bends and turns (Webster’s), but the term is also thought to come from Old English meaning zig-zag. The earliest reference to this meaning has been cited in 1598, but it was not until the 18th century that the term began to be applied to wavy walls. At that time these garden walls were usually aligned east-west, so that one side faced south (Dictionary of Architecture and Landscape Architecture by James Stevens Curl) to catch the warming sun and were historically used for growing fruit.

Many crinkle crankle walls are found in the East Anglia area of England where the marshes of the fen country were drained by Dutch engineers starting in the mid-1600s. The walls’ construction is attributed to these engineers who called them slange muur, meaning snaking wall……’

The Fakenham wall (which must be one of the oldest surviving examples in the U.K.), now encloses the Town’s Community Centre, Registry Office and other community buildings and the surrounding site is mainly laid to grass, with some areas of mature trees and more formal borders. Next to the wall is an old asphalt tennis court (no longer in use) and the border immediately in front was covered in weeds (mainly Alkanet- it has a pretty blue flower, but also has tough tap roots and is a real ‘spreader’), as well as a large area of Hemerocallis (Day Lily). Perhaps a legacy from the wall’s days as a backdrop for fruit growing, each ‘bay’ created by the wavy wall has a fruit tree- apple, cherry or fig. These old trees are all looking rather uncared for and one of my first jobs was to cut back the fig which was covering one of the old brick and slate seats that once must have been used to watch the tennis. Here’s what the area looked like at the start of the project….

The clients (the Community Centre and the Gardening in Fakenham Town – GiFT project) have ideas for improving this wider area and perhaps encouraging it as a space for wedding photos, outdoor events etc. The brief was to come up with a planting plan for the border in front of the south -facing wall to better show off its features, use plants that require limited maintenance and which can cope with the poor soil and aspect.

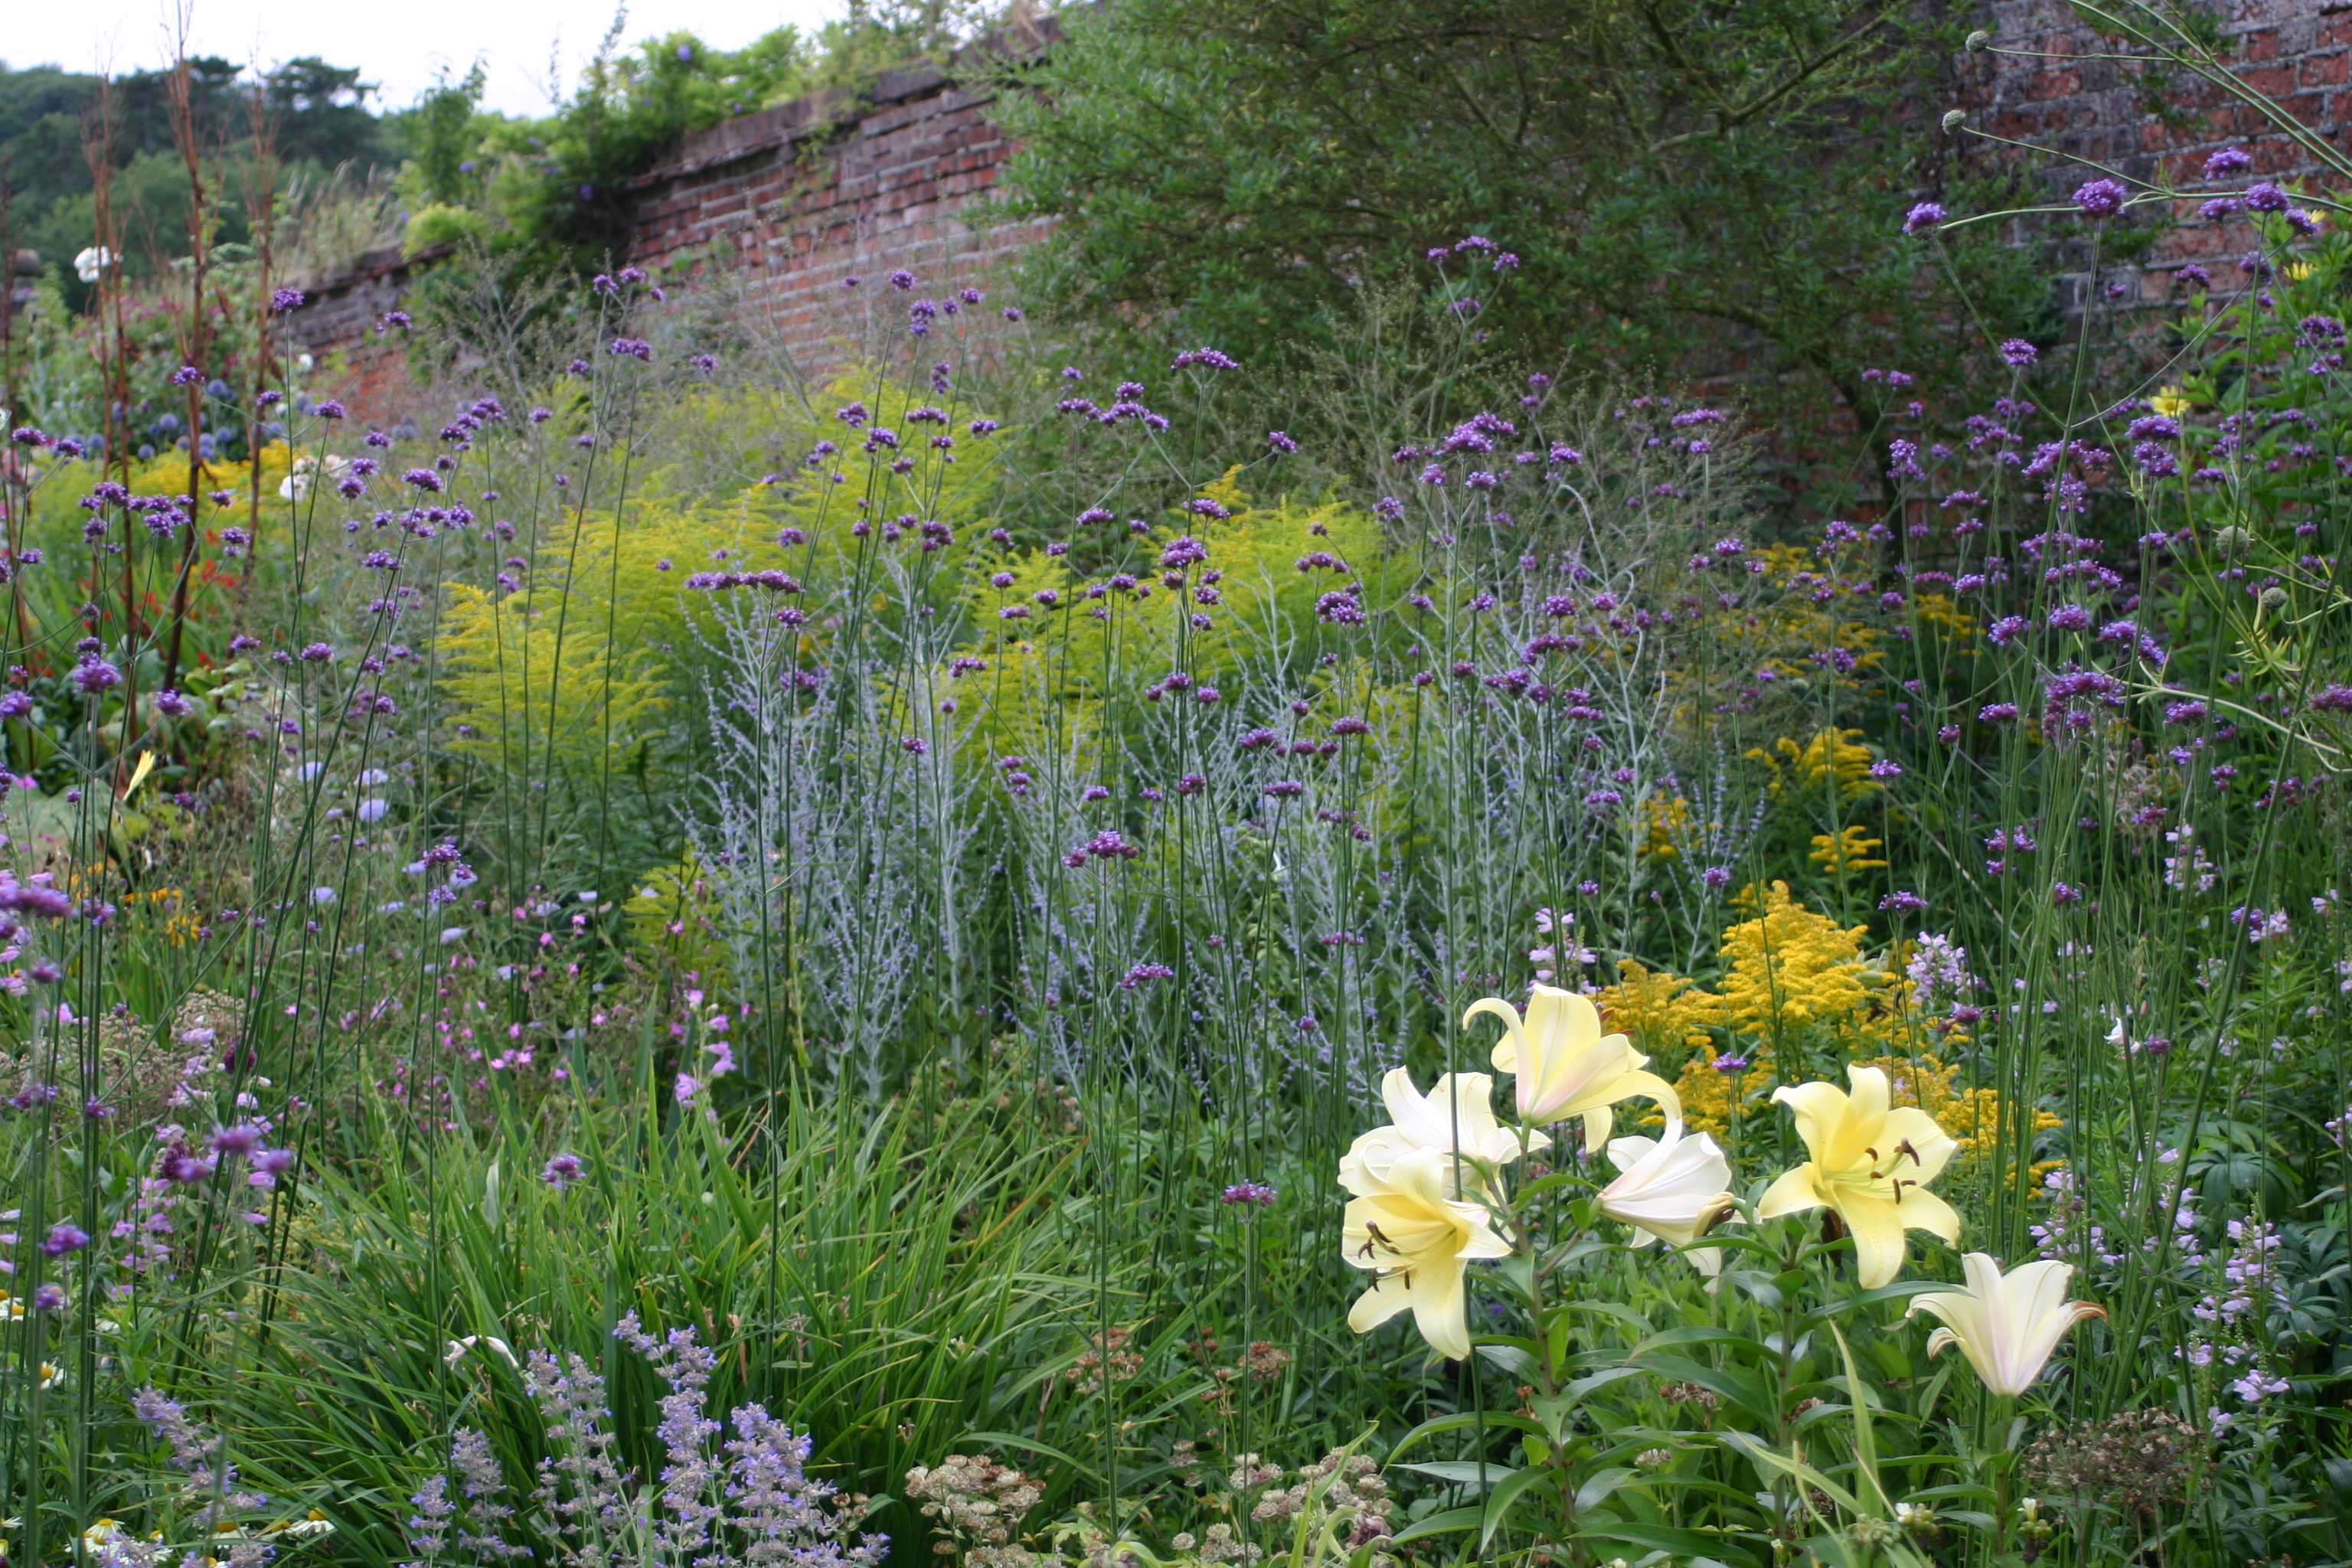
My design involved limited pruning of the other fruit trees, thinning out the large area of Day Lilies and using the thinnings to create a continuous ribbon of these around the base of the wall, and introducing a few shrubs and sub shrubs (Buddleja and Lavender) at key points. These, and a range of herbaceous perennials and grasses were positioned to provide contrasting textures and forms within a broadly colour-themed series of ‘waves’ to pick up the shape of the wall, and taking account of the other strong structural features of the seats and fruit trees.

These waves are alternating combinations of mainly blue and red; blue and yellow and with purple (including purple foliage) to tie these together as a more continuous ribbon through the whole scheme. In addition a selection of different grasses (including Stipa gigantea and Miscanthus sinensis) have been used around each seat to provide a taller, contrasting, soft veil effect with both flowers and foliage to catch the sunlight. I also suggested that old bricks, to harmonise with the wall, could be laid as flooring in front of each seat, softened with ad hoc planting of varieties of Thyme. The first of these seating areas has been used to pilot this and it is hoped that further work will be done to complete the other areas as voluntary help and materials become available.

Children from the local Junior School were involved alongside a handful of volunteers to help me clear the border, prepare the soil and then to plant it up. Here’s how it looked after clearing and planting up…

The final scheme involved planting over 200 plants supplied in the main by Howard Nursery of Wortham, Suffolk and Taverham Nursery Centre, Norfolk. The planting has deliberately been placed closer together than would ultimately be necessary, so as to speed up the ground coverage and so reduce the need for weeding. However, not surprisingly, some roots of the Alkanet remain and have started to sprout once more, so the border will need to be carefully managed to ensure the plants survive and the weeds are removed in its early days.

This week, the children from the Junior School returned to carry out the ‘first weed’ since planting and to draw the wall and look out for insects etc. This marked the formal completion of the project. Here are some pictures of that event…

This slideshow requires JavaScript.

And here’s one of me together with representatives of the main partners: from left to right Rhoda Hincks (Junior School), Janet Holdom (Community Centre) and Pauline Chamberlain (GiFT).

IMG_8926

This has been an interesting and enjoyable project and I look forward to seeing the border in a few months once it has become better established and to seeing progress on the improvements to the wider area. If you’d like to look at pictures and a brief account of the Junior School’s involvement take a look at their blog. 

Old School Gardener

Picture from 'Voice in the Garden Blogspot'
Picture from ‘Voice in the Garden Blogspot’

In researching this article I’ve solved a little mystery. A couple of years ago I ‘liberated’ some curious looking fruits from a tree in a grand garden in Cornwall I was visiting. It was autumn and the leaves were a beautiful muted rusty golden colour. I couldn’t identify it at the time and the three fruits have been sitting on my desk ever since both intruiging and annoying me!

Well it turns out that they are the fruits of Davidia involucrata, better known as the ‘Paper Handkerchief’  or ‘Dove Tree’ because of its large white bracts enclosing the flower (and followed by the fruit). It looks like it may be a long and fiddly business to grow from seed, but I think I’ll have a go!

Common name: ‘Paper Handkerchief’ or ‘Dove’ Tree

Native areas: originally from damp woods in south West China, it is extremely endangered in the wild and also rare in cultivation.

Historical notes: discovered by Pere David in 1869 and introduced in 1904. It first flowered in 1911 on Veitch’s Coombe Wood nursery.

Features: a broadly conical, very beautiful tree that is (eventually) fast growing and of medium to large height, growing to 10-15 metres at maturity. However, it is difficult to grow from a young age and seems to thrive once it gets beyond 2-3 metres tall. Foliage and habit are similar to the Lime.The sharply toothed leaves are heart shaped to around 15 cms long, are pinkish in spring turning bright green above, densely hairy beneath in summer, then turn to gold in the autumn. The flowers are tiny but it is the large white flower bracts up to about 15 cms long that put on a great show in late spring. The fruits are rounded and green, up to 1.5 inches across, later ripening to brown (like the 3  I have here!). The attractive bark is orange brown and peels vertically in flakes.

Uses:  very good in parkland or as a specimen and does best in a sheltered position. Sometimes the cultivar ‘Vilmoriana’ is specified, but it appears to be very similar to the parent species.

This slideshow requires JavaScript.

Growing conditions: Davidia grows best in a sheltered spot in deep fertile soil. It responds to light summer pruning. Growing tips can frost off if it is subjected to icy winds and invariably the best specimens are seen nestled away in a comfy sheltered spot. They also respond well to fertilizers with lots of potassium. They are best trained to a central leader when young with lower branches gradually removed. Propagation is from seed sown immediately upon ripening, germination can take up to 1.5 years but seedlings grow fast. It can also be grown from semi-ripe cuttings taken during late summer. Insect pest and disease problems rarely occur and are not serious.

Further information:

Wikipedia

RHS- Davidia involucrata

Barcham trees directory

Old School Gardener

carpinus betulus autumn colourThis is the third in my new series on garden trees. I’ve also done an article about trees and garden design.

Common name: Hornbeam

Native areas: The 30–40 species occur across much of the north temperate regions, including the U.K., with the greatest number of species in east Asia, particularly China. Only two species occur in Europe, and only one in eastern North America. 

Historical notes: Traditionally, the timber of hornbeams has been used to produce mallets, skittles and even the moving parts of pianos! The common English name of “hornbeam” derives from the hardness of the wood (likened to ‘horn’) and the Old English ‘beam’, a tree (similar to the German for tree, “Baum”).

Pleached trees- picture RHS

Features: A large, deciduous tree (growing to 20 metres plus), with a grey-fluted trunk and spreading canopy. It has ovate, ribbed and serrated edge leaves that turn a beautiful clear yellow in autumn. The flowers are wind-pollinated pendulous catkins, produced in spring. The male and female flowers are on separate catkins, but on the same tree (i.e it is monoecious). The fruit is a small nut about 3–6 mm long, held in a leafy bract; the bract may be either trilobed or a simple oval, and is slightly asymmetrical.

Uses:  Wonderful in a parkland setting, grown in groups, it also ideal for pleaching (i.e. training into a ‘hedge on stilts’) and for use along the edges of smaller gardens – just like here at Old School Garden. Received the Award of Garden Merit from the RHS in 2002.  Some of the cultivars are suitable for smaller gardens as their growth habit is more columnar.

Some of the cultivars available include:

‘Fastigiata’– a tree of medium size (10-15 metres in height) and with a pyramidal habit, slender in its youth. Suitable for smaller areas despite developing ‘middle age spread’ (it can grow out to  1o metres wide). Very effective if left feathered at the base to encourage gold and orange autumn leaf colour. Stiffly ascending branches give it a columnar shape, resembling Lombardy Poplar.

‘Fastigiata Frans Fontaine’- selected from a street in the Netherlands in the 1980’s this retains its columnar habit better than the ordinary ‘Fastigiata’ variety (3 metres wide after 25 years) so is even better suited to restricted areas.

‘Purpurea’-  medium height (10-15 metres), introduced in the 1870’s , this is well suited to arboretums and plant collections. Young leaves flush with a purple tinge and then gradually turn deep green and them a similar yellow to the species hornbeam in  autumn. Slower growing and ultimately smaller than the species tree. Well suited to heavier soils.

”Japonica’-  (Japanese hornbeam), introduced from Japan in 1895, a small (5-10 metres tall), rounded tree, very effective if pleached. Darker than the species tree, with heavily corrugated leaves, darker than the species tree. Attractive, prolific hop-like fruit. AGM in 2002

Growing conditions: hornbeams grow well in most soils, including clay and chalk and is useful for planting where there are poor planting conditions.

 Further information:

Wikipedia

RHS- Carpinus betulus

RHS- pleaching

Barcham trees directory

Old School Gardener

Frog_in_pond_among_aquatic_plants Today’s question comes from a gardener in North Yorkshire. Ernie Uplad of Richmond has just created a new garden pond in an open, sunny spot away from trees and wants some advice about planting:

‘I’m pleased with my new pond but need some help with deciding when to plant it up, the mix of plants to use and how to go about this- can you help, please?’

When to plant?

Well Ernie, you seem to have made a great start with the choice of a good location for your pond. As for planting  now (early spring to mid June) is the perfect time, as the weather is warming up. If you plant to put in some fish (I wouldn’t myself as they tend to eat much of the other wildlife that will inhabit your pond), then it’s important to plant up before you install them as they might go hungry unless you take the trouble to feed them yourself.

What to plant?

Some plants are essential for a pond (whether it’s for ornamental or wildlife value) – oxygenators. These are plants which live almost entirely underwater  and help to maintain an adequate level of oxygen for the other plants, fish and other animal life. They also help to reduce the level of algae, as do water lilies. The oxygenators include Canadian pondweed (Elodea canandensis), which is vigourous; Egeria densa (less vigourous); water Milfoil (Myriophyllum spicatum), with its delightful feathery foliage; and M. verticillatum, also with feathery foliage, and which also likes limy water.There are also plants you should avoid at all costs- the so called space invaders! Here’s a useful guide to these. 

You migth also like to consider ‘marginals’ – these are grown on the inside edge of the pond- here’s a guide to marginal plants. And, don’t forget plants that grow in permanently damp soil- in a bog garden you may have created next door to your pond. Here’s another useful guide to plants for a bog garden.

For planting actually in the pond here is a selection of plants to add height (they all grow up to around 45 cms (18ins) high) and will add other interest:

Water hawthorn (Aponogeton distachyus), with white flowers with dark spots throughout the year

Acorus gramineus ‘Variegatus’, for foliage colour in green and gold

Bog Arum (Calla palustris) with white flowers in summer

Calla palustris ‘Plena’ with double yellow flowers in March- April

Cotula coronopifolia with yellow ‘buttons’ in  July- August

Hydrocharis morsus-ranae, with white-flowered floaters all summer

Mimulus moschatus and M. ‘Whitecroft Scarlet’ with yellow and red flowers, respectively,  all summer

Golden Club (Orontium aticum) with yellow club flowers in May- June

All medium-sized lilies (Nymphaea) in red, white, pink and yellow shades throughout the summer.

How to plant?

Well, let’s take water lilies first.The crowns (rhizomes or tubers) should be planted in a medium to heavy loam with the crown tips exposed and upright- they must not be buried. all other container plants can be planted in the same type of soil and to the same depth as they were at the nursery or when you propagated them, but avoid over rich soils; you can buy special aquatic compost if you like, but by avoiding rich soils  you will minimise problems with algae and weed through raising the nutrient levels in the water. The oxygenators will need to be weighted if this has not already been done by the nursery. Clumps of 6-12 small pieces should be put on the floor of the pool and held in a group by a lead weight. This will keep them from floating to the surface. Natural floaters like Hydrocharis morsus-ranae are simply put on the surface.

How to propagate?

You might in due course want to propagate your own plants and for most water plants this is very simple. you just divide them in the spring after lifting out the containers any plants you  require. Division is achieved by driving in either two handforks (or two larger forks for larger plants) back to back, then pushing the forks apart to prise away the outermost plants in the clump. Do not use the centre crowns; these are the oldest parts of the plant and should be disposed of.

A pond is a fantastic resource for wildlife

Further information: RHS guide to aqauatic planting

Old School Gardener


Planting Patterns #7

Planting as form at Marqueyssac, France

Old School Gardener

Planting Patterns #6

Farming following the contours of the land in Minnesota

via Kids’ Brittanica

Old School Gardener

Planting Patterns #5

Spring in the step

Old School Gardener

Planting Patterns #4

Green (and wet) roof at the Intercontinental Sanya Resort

Old School Gardener

Planting Patterns #1

A Lettuce swirl

Old School Gardener

Herbaceous borders at Peckover House, Wisbech

Now’s the time to set about creating new borders in your garden and I’m grateful to Hyde N. Seik from Plymouth who asks:

‘I’ve seen some wonderful borders at a National Trust property near me. I enquired about these and was told that they are ‘herbaceous borders’. Can you tell me what this means and how to go about creating one, please?’

Hyde, there’s perhaps nothing as quintessentially English as an Herbaceous border (it became especially popular in the late 19th and early 20th century garden), and many of those associated with our great historic houses are some of the best examples around. This is usually a rectangular border (or twin borders with a lawn or other path running between them), traditionally at least 3 metres wide and about 12 metres long, usually backed by an evergreen hedge. The lengths and widths do vary, but the usual dimensions maintain a ratio of 4:1 (length to depth). The border is planted entirely with herbaceous perennials (plants that grow for more than one year and die back above ground after flowering). The border is designed to be of interest when viewed from the front or along its length and looks its best from late spring to late summer.

These days the amount of work needed to maintain such borders – staking of taller plants to provide support, pruning back dead stems and foliage, feeding and dividing the plants every few years- might be too much for many gardeners and so herbaceous borders can be rather smaller and more irregular in shape, or alternatively have a mixture of planting (including evergreen shrubs, grasses, and annuals) to reduce the workload and provide more structural interest during the winter.

Herbaceous borders are usually planted with clusters of each type of plant, in odd numbered groups of 3, 5 or 7 plants- the tallest are usually at the back of the border and the shortest at the front. However, in recent times this approach has been challenged as borders can look more interesting if some taller plants are placed nearer the front of the border; especially if they add height but are not too dominant, such as Verbena bonariensis and many grasses.

The airy stems of Verbena bonariensis

As your plants are likely to be in the same place for some time, it pays to prepare the soil thoroughly. Remove all weeds, especially the perennial types with deep roots, by digging, hoeing (or you could use a suitable weedkiller such as Glyphosate in the growing season). Then fork the soil to a depth of at least 150mm adding organic matter such as compost or manure, rotted bark, or other manures such as those from hops or mushroom growing. Lime might also be needed if the soil is very acid (peaty) or in generally very poor condition.

This should be applied in autumn or spring, one month before planting or adding organic material, and at least 2-3 months before adding manure (lime and manure should never be applied at the same time). Incidentally, nearly all herbaceous perennials grow well in most soil types, provided they are neither very acidic or alkaline- by manuring and liming regularly, the soil can be kept at a fairly neutral pH, and regular mulching with organic matter will keep the soil nutrient levels up, avoiding the need for artificial fertilisers or feeds.

If possible, leave the freshly dug soil for a couple of months to allow it to settle, then rake over the surface to produce a reasonably fine, crumbly surface.

Whilst you’re waiting for the soil to be readied it’s worth planning the border planting in some detail. Using a sheet of graph paper, draw on it (to scale) the shape of the border (you could of course have begun with an outline plan on paper for this and then scaled this up to create the new border). Then select your plants from a catalogue, book or online information resource which not only describes the plants but gives their height and ultimate spread/width. Think about the different flower shapes, leaf textures as well as colours in composing your border planting plan and also when the plants flower or have other interest (e.g. leaf colour, berries or other fruit) – to ensure a balanced spread of flowering or other interest throughout the seasons.

Allow for the plants to be grouped in clumps of 3’s or 5’s (odd numbers tend to create informal looking groups whereas even numbers tend to lead to a more formal, regimented layout). These groups can be drawn on your plan with a circle guide or compasses and then a line enclosing the group drawn around them. If you use a set of colour pencils or crayons to draw these groups according to their flower/leaf colour it will help give you an idea of the colour scheme you are creating. Other information – height, flowering time etc.- can be written on your plan and help to check the overall design and ensure that there is no period in the year without interest of some sort (this can extend to winter interest created from strong shapes such as evergreens and grasses as well as some herbaceous plants that hold on to their dead flower heads or foliage).

The best time to plant your herbaceous border is in the autumn or spring, although plants grown in containers can be planted at any time, provided they are kept well watered and the ground is not frozen or flooded. If you buy by mail order, the nursery will send you plants at the right time for planting, although the roots will probably have little or no soil on them (‘bare rooted’). If you can’t get them planted on arrival, store them in a cool place in damp, sandy soil or put them in a trench in the garden (so called ‘heeling in’). However, do try to plant them out as quickly as possible provided the ground is workable.

If the plants seem dry on arrival, soak the roots in water for 24 hours; if any are damaged in transit, let the nursery know as soon as possible, so that they can be replaced.

Herbaceous border at Copped Hall, Essex

Planting is best done with a trowel. Set the plants out in the planting positions on the soil surface and then move them around to make sure they are in line with your plan which should suit their final growing widths. Dig holes under each plants big enough to accommodate the roots of the plant without cramping them. Work from the back of the border (or centre if it is an island bed). Always plant to the same depth as the soil mark on the stems of the plants.

Hoe carefully to remove footmarks, and water in the plants with a thorough but gentle sprinkling. Don’t forget to label each group of plants, as once they die down you may forget where they were – though your reference plan should help with this. Most herbaceous perennials will spread outwards, gradually dying off from the original centre, so every few years these plants will need dividing, repositioning and mulching. And some of the taller ones will need staking to support them, at least in the early years before those around them provide some mutual support.

Old School Gardener

Finding Nature

Nature Connectedness Research Blog by Prof. Miles Richardson

Norfolk Green Care Network

Connecting People with Nature

Discover WordPress

A daily selection of the best content published on WordPress, collected for you by humans who love to read.

Susan Rushton

Celebrating gardens, photography and a creative life

Unlocking Landscapes

Writing, photography and more by Daniel Greenwood

Alphabet Ravine

Lydia Rae Bush Poetry

TIME GENTS

Australian Pub Project, Established 2013

Vanha Talo Suomi

The Journey from Finnish Rintamamiestalo to Arboretum & Gardens

Marigolds and Gin

Because even in chaos, there’s always gin and a good story …

Bits & Tidbits

RANDOM BITS & MORE TIDBITS

Rambling in the Garden

.....and nurturing my soul

The Interpretation Game

Cultural Heritage and the Digital Economy

pbmGarden

Sense of place, purpose, rejuvenation and joy

SISSINGHURST GARDEN

Notes from the Gardeners...

Deep Green Permaculture

Connecting People to Nature, Empowering People to Live Sustainably

BloominBootiful

A girl and her garden :)