- Herbaceous borders at Peckover House, Wisbech

Now’s the time to set about creating new borders in your garden and I’m grateful to Hyde N. Seik from Plymouth who asks:
‘I’ve seen some wonderful borders at a National Trust property near me. I enquired about these and was told that they are ‘herbaceous borders’. Can you tell me what this means and how to go about creating one, please?’
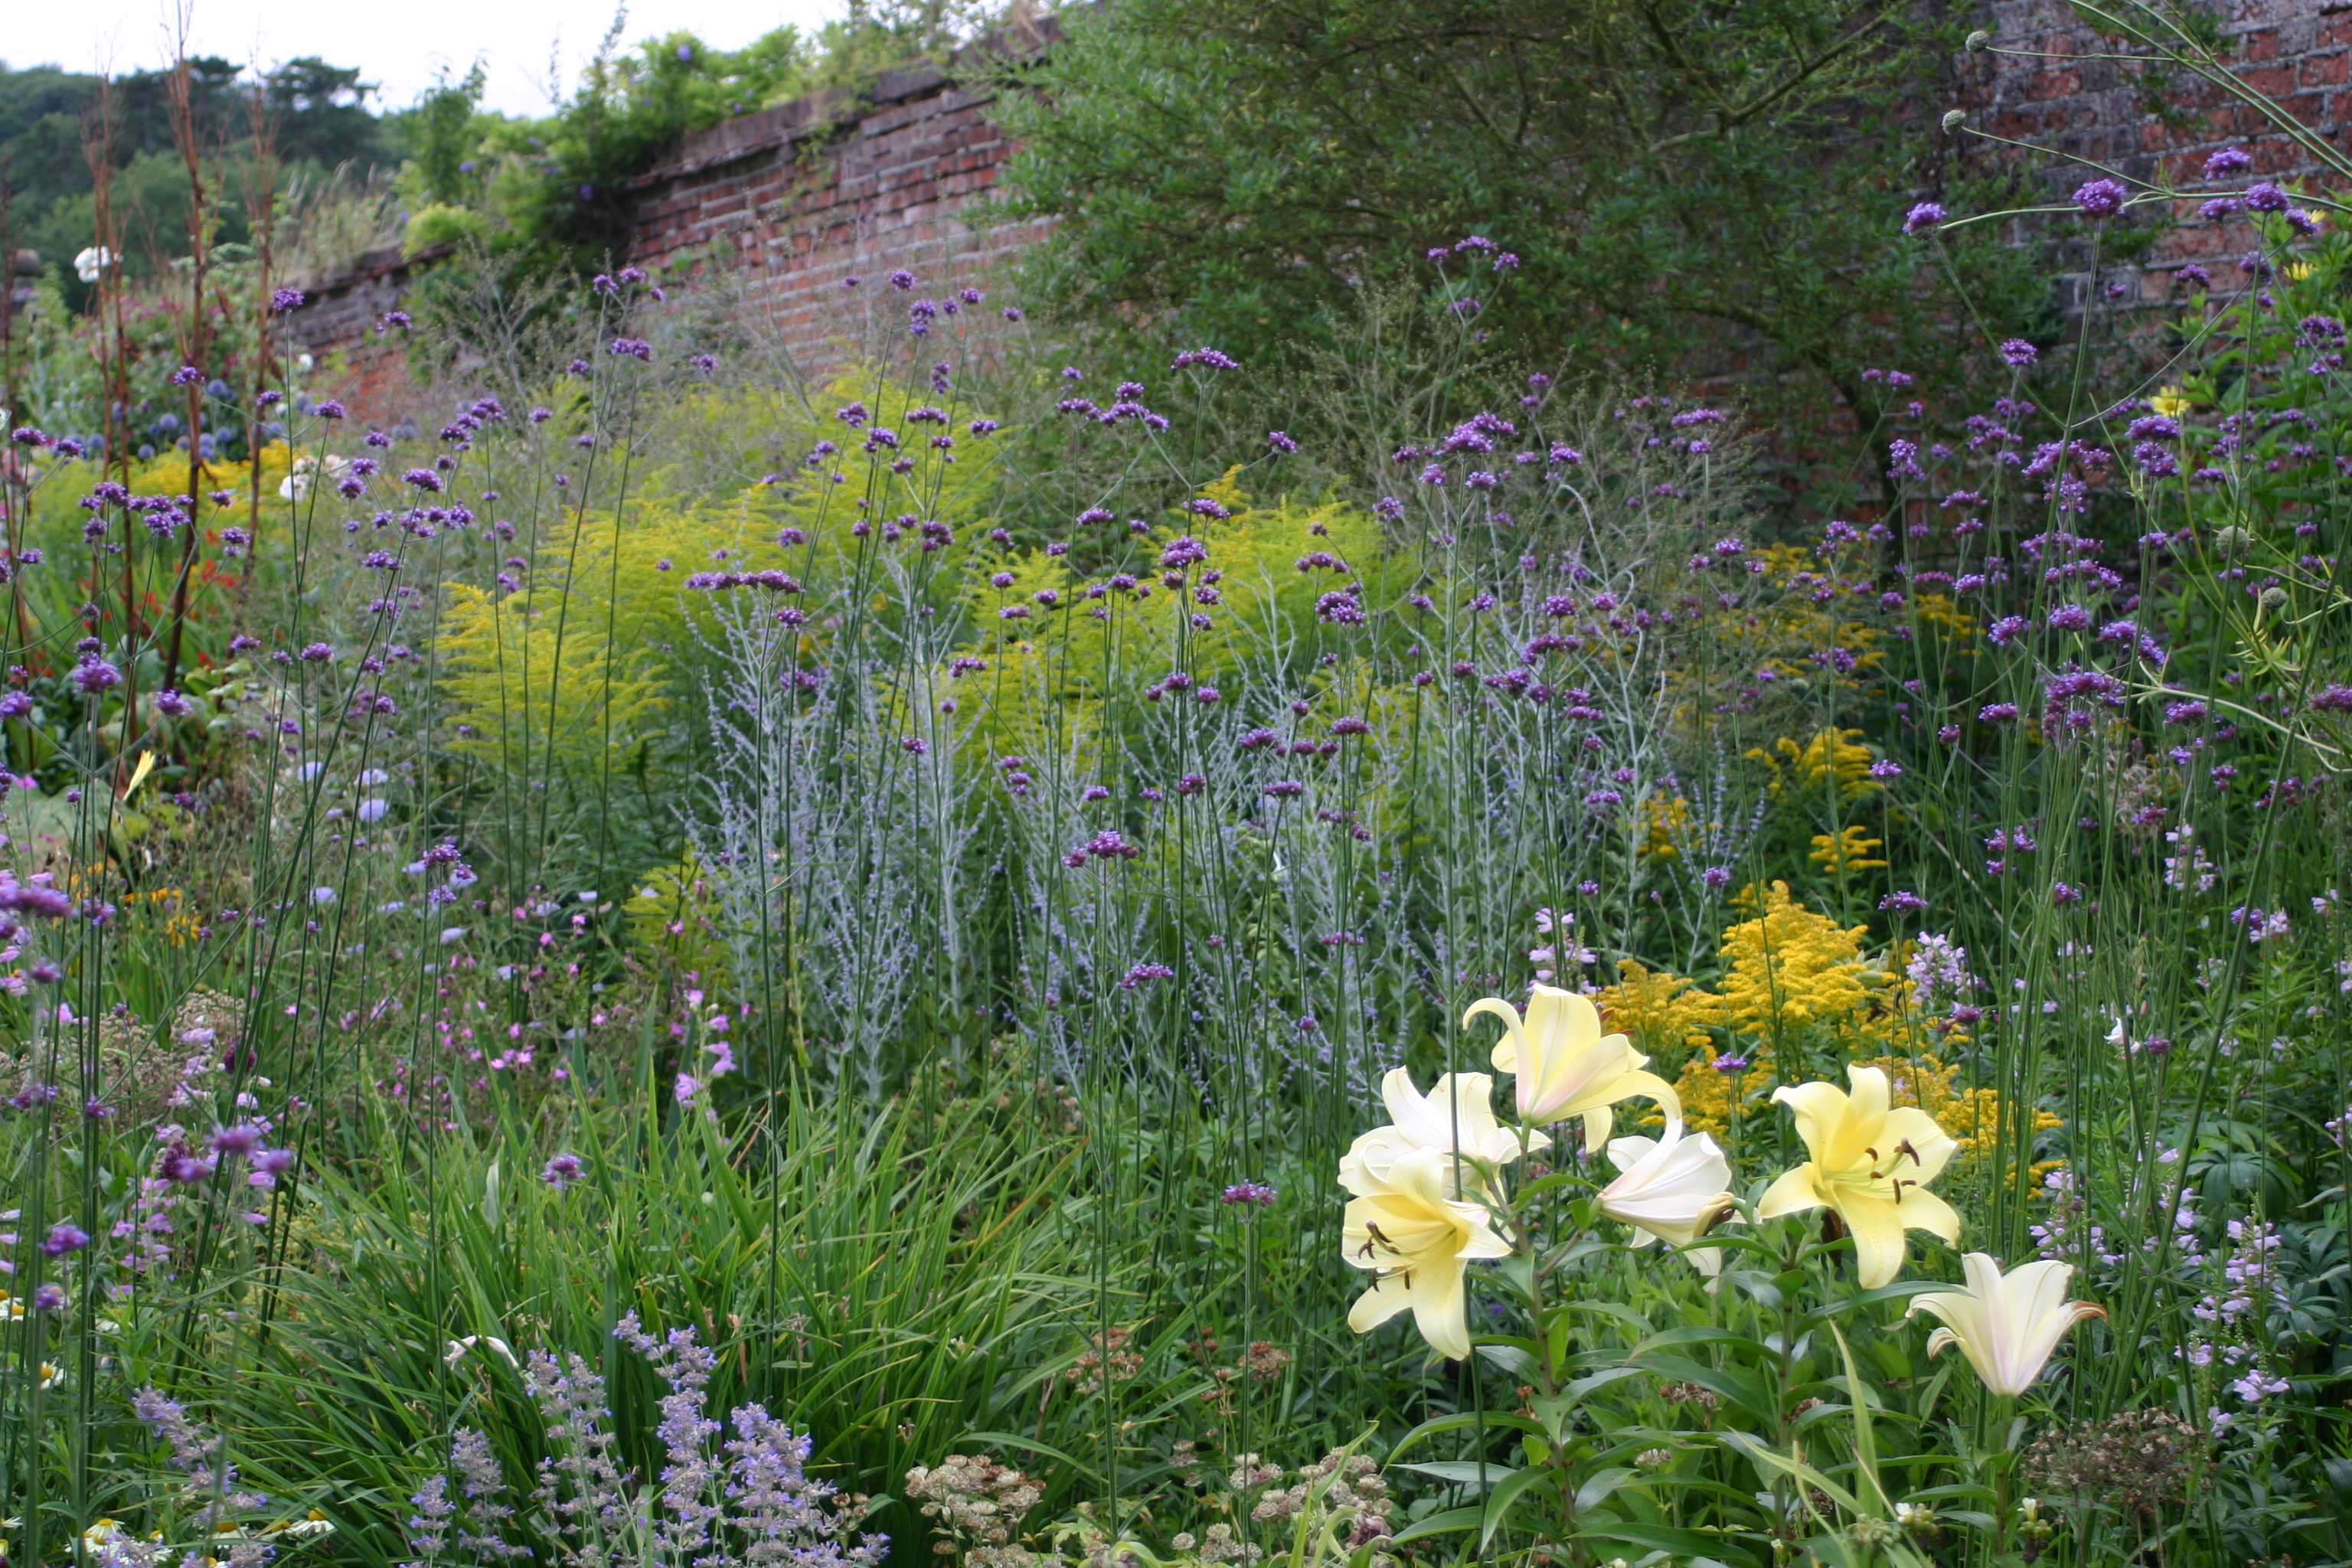
Hyde, there’s perhaps nothing as quintessentially English as an Herbaceous border (it became especially popular in the late 19th and early 20th century garden), and many of those associated with our great historic houses are some of the best examples around. This is usually a rectangular border (or twin borders with a lawn or other path running between them), traditionally at least 3 metres wide and about 12 metres long, usually backed by an evergreen hedge. The lengths and widths do vary, but the usual dimensions maintain a ratio of 4:1 (length to depth). The border is planted entirely with herbaceous perennials (plants that grow for more than one year and die back above ground after flowering). The border is designed to be of interest when viewed from the front or along its length and looks its best from late spring to late summer.
These days the amount of work needed to maintain such borders – staking of taller plants to provide support, pruning back dead stems and foliage, feeding and dividing the plants every few years- might be too much for many gardeners and so herbaceous borders can be rather smaller and more irregular in shape, or alternatively have a mixture of planting (including evergreen shrubs, grasses, and annuals) to reduce the workload and provide more structural interest during the winter.
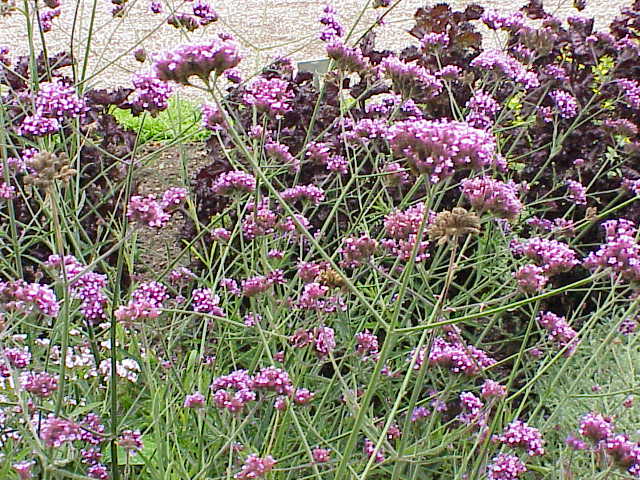
Herbaceous borders are usually planted with clusters of each type of plant, in odd numbered groups of 3, 5 or 7 plants- the tallest are usually at the back of the border and the shortest at the front. However, in recent times this approach has been challenged as borders can look more interesting if some taller plants are placed nearer the front of the border; especially if they add height but are not too dominant, such as Verbena bonariensis and many grasses.

- The airy stems of Verbena bonariensis
As your plants are likely to be in the same place for some time, it pays to prepare the soil thoroughly. Remove all weeds, especially the perennial types with deep roots, by digging, hoeing (or you could use a suitable weedkiller such as Glyphosate in the growing season). Then fork the soil to a depth of at least 150mm adding organic matter such as compost or manure, rotted bark, or other manures such as those from hops or mushroom growing. Lime might also be needed if the soil is very acid (peaty) or in generally very poor condition.
This should be applied in autumn or spring, one month before planting or adding organic material, and at least 2-3 months before adding manure (lime and manure should never be applied at the same time). Incidentally, nearly all herbaceous perennials grow well in most soil types, provided they are neither very acidic or alkaline- by manuring and liming regularly, the soil can be kept at a fairly neutral pH, and regular mulching with organic matter will keep the soil nutrient levels up, avoiding the need for artificial fertilisers or feeds.
If possible, leave the freshly dug soil for a couple of months to allow it to settle, then rake over the surface to produce a reasonably fine, crumbly surface.
Whilst you’re waiting for the soil to be readied it’s worth planning the border planting in some detail. Using a sheet of graph paper, draw on it (to scale) the shape of the border (you could of course have begun with an outline plan on paper for this and then scaled this up to create the new border). Then select your plants from a catalogue, book or online information resource which not only describes the plants but gives their height and ultimate spread/width. Think about the different flower shapes, leaf textures as well as colours in composing your border planting plan and also when the plants flower or have other interest (e.g. leaf colour, berries or other fruit) – to ensure a balanced spread of flowering or other interest throughout the seasons.
 Mixed borders at Old School Garden- looser feel with evergreen shrubs, grasses and mixed hedges as a backdrop

Mixed borders at Old School Garden- looser feel with evergreen shrubs, grasses and mixed hedges as a backdrop
Allow for the plants to be grouped in clumps of 3’s or 5’s (odd numbers tend to create informal looking groups whereas even numbers tend to lead to a more formal, regimented layout). These groups can be drawn on your plan with a circle guide or compasses and then a line enclosing the group drawn around them. If you use a set of colour pencils or crayons to draw these groups according to their flower/leaf colour it will help give you an idea of the colour scheme you are creating. Other information – height, flowering time etc.- can be written on your plan and help to check the overall design and ensure that there is no period in the year without interest of some sort (this can extend to winter interest created from strong shapes such as evergreens and grasses as well as some herbaceous plants that hold on to their dead flower heads or foliage).
The best time to plant your herbaceous border is in the autumn or spring, although plants grown in containers can be planted at any time, provided they are kept well watered and the ground is not frozen or flooded. If you buy by mail order, the nursery will send you plants at the right time for planting, although the roots will probably have little or no soil on them (‘bare rooted’). If you can’t get them planted on arrival, store them in a cool place in damp, sandy soil or put them in a trench in the garden (so called ‘heeling in’). However, do try to plant them out as quickly as possible provided the ground is workable.
If the plants seem dry on arrival, soak the roots in water for 24 hours; if any are damaged in transit, let the nursery know as soon as possible, so that they can be replaced.

- Herbaceous border at Copped Hall, Essex