Archive for 2013


Spring-lawn
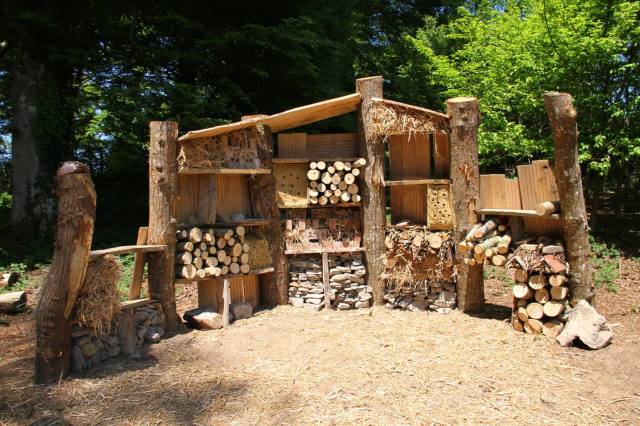
A grass -free ‘Floral Lawn’ has been opened today in Avondale Park, West London. It’s plants, which include daisies, red-flowering clover, thyme, chamomile, pennyroyal and Corsican mint, create a “pollinator-friendly patchwork” – with 25% more insect life than that found in “traditionally managed grass lawns”.

The Royal Borough of Kensington and Chelsea commissioned the biodiverse floral lawn from Lionel Smith, a Royal Horticultural Society (RHS) sponsored PhD student, and RBKC’s gardening team. It is the first time that a public park has featured this new form of lawn.

Planting a public space with specially selected and researched plants will give Lionel a valuable insight into how the public will react to this non-traditional lawn. Previously all his research has been on experimental plots at Reading University. The idea has prompted questions about ‘just what makes a lawn a lawn’. Lionel says:

“Lawns are normally associated with closely trimmed grass but mine are, I believe, entitled to be called that too. They are not only beautiful and easy to maintain but also environmentally friendly. It will be interesting to see how visitors to Avondale Park, where this public trial sward is to be being planted, will react. I hope to get some feedback as part of my research.”

Traditional grass lawns, if regularly mown,  might look good, but have you thought about:

  • how they provide a pretty sterile living environment for insects and other critters?
  • how demanding they can be in terms of water, fertiliser, weedkiller, and energy use?

What do you think about this? Have you got a traditional grass lawn in your garden or have you turned it (or some of it) over to wild flowers or other uses? Should we turn over more areas of traditional grass lawn in public parks and spaces into grass- free or more diverse habitats? I’d love to hear your views!

Further information:

BBC News report and video

‘Rethinking the traditional grass lawn’ -blog article by Lionel Smith

Old School Gardener

If you’ve enjoyed reading this post and others on this blog, why not comment and join others by signing up for automatic updates via email (see side bar, above right ) or through an RSS feed (see top of page)?

Photo0126

One of the finished planters standing alongside the Playground

My examples of using pallets and other old timber for garden projects seem to have been very popular (see links below). I’m experimenting myself with some ideas, including vertical pallet planters, made with a group of children (aged 7-10)at my local Primary school as part of a Gardening Club there. This has been great fun and a good learning experience for me as well as the children! We used pallets I was given by a builder at the Museum where I volunteer – they were relatively small pallets used for stacking bricks, so were a manageable size for the children.

I followed the guide produced by Garden Designer Mike Rendell (you can access a pdf of this here). It was fairly straightforward and with some help, the children managed to do most of the tasks needed to achieve some pretty flowering planters which now adorn the edge of their playground.

What we did:

1. Sawed off the ends of the slats so that there were solid timber sides to the planter – the children coped with this with a bit of help now and again (it didn’t help that my saws weren’t that sharp!).

2. Removed every other slat to provide space for planting – this proved to be difficult, especially for the children, as it involved a lot of strength and using claw hammers and the like.

3. Nailing two of the spare slats, one to the top, the other to the bottom of the planter – the children enjoyed using hammers and nails (it was helpful being able to use the nails and pre set holes already in the removed slats).

4. Painting the planters – we chose a rich blue paint suitable for outdoor furniture and the children enjoyed painting, though some of the younger ones had to be encouraged to ensure every bit of wood was properly covered!

5. Stapling some spare landscaping fabric to the back of the planter. I’d pre cut the size needed (allowing for a double layer joined in the middle and overlapping it around the sides and top of the planter). The children found it very difficult using the staple gun, which was designed for bigger hands, so I had to do this for them, whilst they held the fabric in place.

6. After this the children nailed the remaining spare slats to the back of the planter to provide reinforcement. Again, with a bit of basic ‘hammer tuiton’ the children managed this pretty well, though we did use some spare nails where some of the old ones got bent in the process.

7. The children then filled and compacted the compost into the planters, starting at the bottom and planting up as they went. We used about 40 litres of peat free compost per planter, a little loose, but with compaction and wetting seemed to hold together reasonably well. The children tired a bit towards the end, so I made sure the compost was properly compacted and roots covered. Once tidied up, the planters were thoroughly watere. Incidentally the plants were kindly donated by a local nursery woman who had held a plant sale at the school a few weeks before. We have a mix of Petunias, Antirrhinums, Dahlias, Geraniums and Impatiens- quite a mix and it will be interesting to see how some of the larger varieties fare in this vertical world!

8. I had fixed some cup hooks to the top and rear of each planter so that they can eventually be hooked into the fence to avoid them falling over, though for now the planters are at an angle to allow the compost and plants to become firmer.

Having  just seen a TV programme about the ‘Pallet Garden’ competition at the ‘Gardening Scotland’ show, I might try to introduce some sort of competition next year within the school (or maybe even between local schools?) …watch this space!

Other articles on pallets and other recycled wood in the garden:

Pallets Plus –  more examples of recycled wood in the garden

Pallet Power

Pallet Power- the sequel

Raised beds on the cheap

Old School Gardener

If you’ve enjoyed reading this post and others on this blog, why not comment and join others by signing up for automatic updates via email (see side bar, above right ) or through an RSS feed (see top of page)?

Picpost: One Green Bottle

This is perhaps the smallest, oldest surviving ecosystem in the world. A garden in a bottle, planted by David Latimer in 1960 was last watered in the year 1972 before it was tightly sealed. David Latimer, 80, from Cranleigh in Surrey wanted to see how long the ecosystem would survive and to everybody’s amazement the little world is still thriving entirely on recycled air, nutrients and water.

The only external thing fed to this bottled-garden was light without which there would be no energy for plants inside to create their own food and continue to grow. Other than that this is an entirely self-sufficient ecosystem, with the plant and bacteria in the soil working together.’
Recycled art Foundation


Picpost: Reflections

Picpost: Reflections

Recycled windows with mirrors replacing glass provide an attractive, novel garden feature, echoing ‘trompe d’oeil’ (tricks of the eye) of older gardens

Picpost: Hotel Heligan

‘Work is nearing completion on our new insect hotel which is located on our Georgian Ride! This fantastic structure has been built using a variety of natural materials and will attract various Heligan insects such as solitary bees, earwigs, spiders, lady bird, maybe the odd toad and much much more!’  The Lost Gardens of Heligan

PicPost: City Centre Parking

Central Park, New York

family eating in the gardenYou might not think of ‘family gardens’ as a particular garden style, but there are some common ingredients needed for a successful space for everyone from the toddler through to parents (and possibly grandparents) as well as the family pet(s) of course! My latest ‘snippet on style’ focuses on what you might need in your family space.

Having said that there are some common ingredients in family gardens, in terms of its overall look these spaces can adopt almost any of the more common design styles such as formal, country, cottage etc., though the functional needs of the family garden do impose some limitations. The minimum requirements are usually to provide a flexible space for games (and scope for these games to change as children grow), room for entertainment and play, and an area for outside dining (maybe including an area for cooking the food too, such as a barbeque). The smallest gardens can accommodate a sandpit or swing, while larger plots have space for separate adult- and child-friendly zones. The key features often include:

  • Play equipment

  • Colourful materials

  • Dens and tents

  • Tough plants

  • Wildlife features

  • Easy care seating

For tips on including play opportunities in gardens see my earlier article ”Free range’ children? – seven tips for successful garden play’ and others on play.

Other articles in the ‘Style Counsel’ series:

Productive Gardens

Japanese Gardens

Country Gardens

Modernist Gardens

Formal Gardens

Mediterranean Gardens

Cottage gardens

Old School Gardener

If you’ve enjoyed reading this post and others on this blog, why not comment and join others by signing up for automatic updates via email (see side bar, above right ) or through an RSS feed (see top of page)?

Picpost: Frilled to be here

ChrysanthemumsI’ve received a question from a Nottinghamshire gardener about different kinds of cutting. Mr. R.Hood asks:

‘What is the difference between softwood and greenwood cuttings? I’ve read that chrysanthemums are propagated from greenwood.’

Well, Mr. Hood, the difference comes down to something quite smallsoftwood cuttings are taken from the first flush of new growth in spring, whereas greenwood cuttings are taken slightly later, when the wood at the base of the cutting is a little firmer – these cuttings do not root quite as quickly.  Greenwood cuttings are easier to handle than softwood, and they are less prone to wilting. Therefore, greenwood cuttings should be used to propagate plants that root readily, like Delphiniums, Pelargoniums and indeed Chrysanthemums. Chrysanthemum cuttings could not be easier and for every mother or grandmother plant, you can produce at least 10 of a new generation. For an easy guide on how look at this article.

Softwood cutting

Softwood cutting

And while we’re talking about propagating new plants from cuttings how about evergreen plants?

Cuttings from these plants are usually taken from ‘ripe or semi ripe wood’ (i.e. when stems are firmer and buds have developed) in early summer and autumn and rooted  in a cold frame. They can be anything from 50 -150cm long, depending on the size of the plant, and preferably with a ‘heel’ of older wood where the cutting stem has been pulled away from the main stem. You then strip off the lower leaves, and if there is no heel, make a wound about 13mm long at the base of the cutting. Apply a hormone rooting powder to the base of the cutting (just a light dusting) and insert the cutting to half their length in soil – you can probably put a number around the edge and in the centre of a pot. To help reduce water loss from the remaining leaf/leaves, cut these in half.

Semi ripe cutting

Semi ripe cutting

The pot should then be placed in a cold frame (you can also root the cuttings directly into the soil in a cold frame , but make sure it has been forked over and manured/composted a week or two beforehand).  Water them well and close the frame completely. Inspect and water them regularly and harden them off during the summer to prepare them for planting out the following autumn.

You can create your own 'mini cold frame' by using plastic covers or bags over pot-planted cuttings

You can create your own ‘mini cold frame’ by using plastic covers or bags over pot-planted cuttings

Another technique, if you don’t have a cold frame, is to put a plastic cover, or bag secured with an elastic band over the top of the pot – this helps to prevent the cuttings drying out, by maintaining a naturally humid atmosphere. These effectively become ‘mini cold frames’ themselves.

It seems you can grow some evergreen cuttings by placing them into a cut potato! - this one is Wisteria.

It seems you can grow shrub cuttings by placing them into a cut potato! – this one is Wisteria, see the link for further info

Further information:

Softwood and Greenwood cuttings – RHS

Semi ripe cuttings- RHS

Propagating shrubs in a potato

Old School Gardener

If you’ve enjoyed reading this post and others on this blog, why not comment and join others by signing up for automatic updates via email (see side bar, above right ) or through an RSS feed (see top of page)?

Finding Nature

Nature Connectedness Research Blog by Prof. Miles Richardson

Norfolk Green Care Network

Connecting People with Nature

Discover WordPress

A daily selection of the best content published on WordPress, collected for you by humans who love to read.

Susan Rushton

Celebrating gardens, photography and a creative life

Unlocking Landscapes

Writing, photography and more by Daniel Greenwood

Alphabet Ravine

Lydia Rae Bush Poetry

TIME GENTS

Australian Pub Project, Established 2013

Vanha Talo Suomi

The Journey from Finnish Rintamamiestalo to Arboretum & Gardens

Marigolds and Gin

Because even in chaos, there’s always gin and a good story …

Bits & Tidbits

RANDOM BITS & MORE TIDBITS

Rambling in the Garden

.....and nurturing my soul

The Interpretation Game

Cultural Heritage and the Digital Economy

pbmGarden

Sense of place, purpose, rejuvenation and joy

SISSINGHURST GARDEN

Notes from the Gardeners...

Deep Green Permaculture

Connecting People to Nature, Empowering People to Live Sustainably

BloominBootiful

A girl and her garden :)